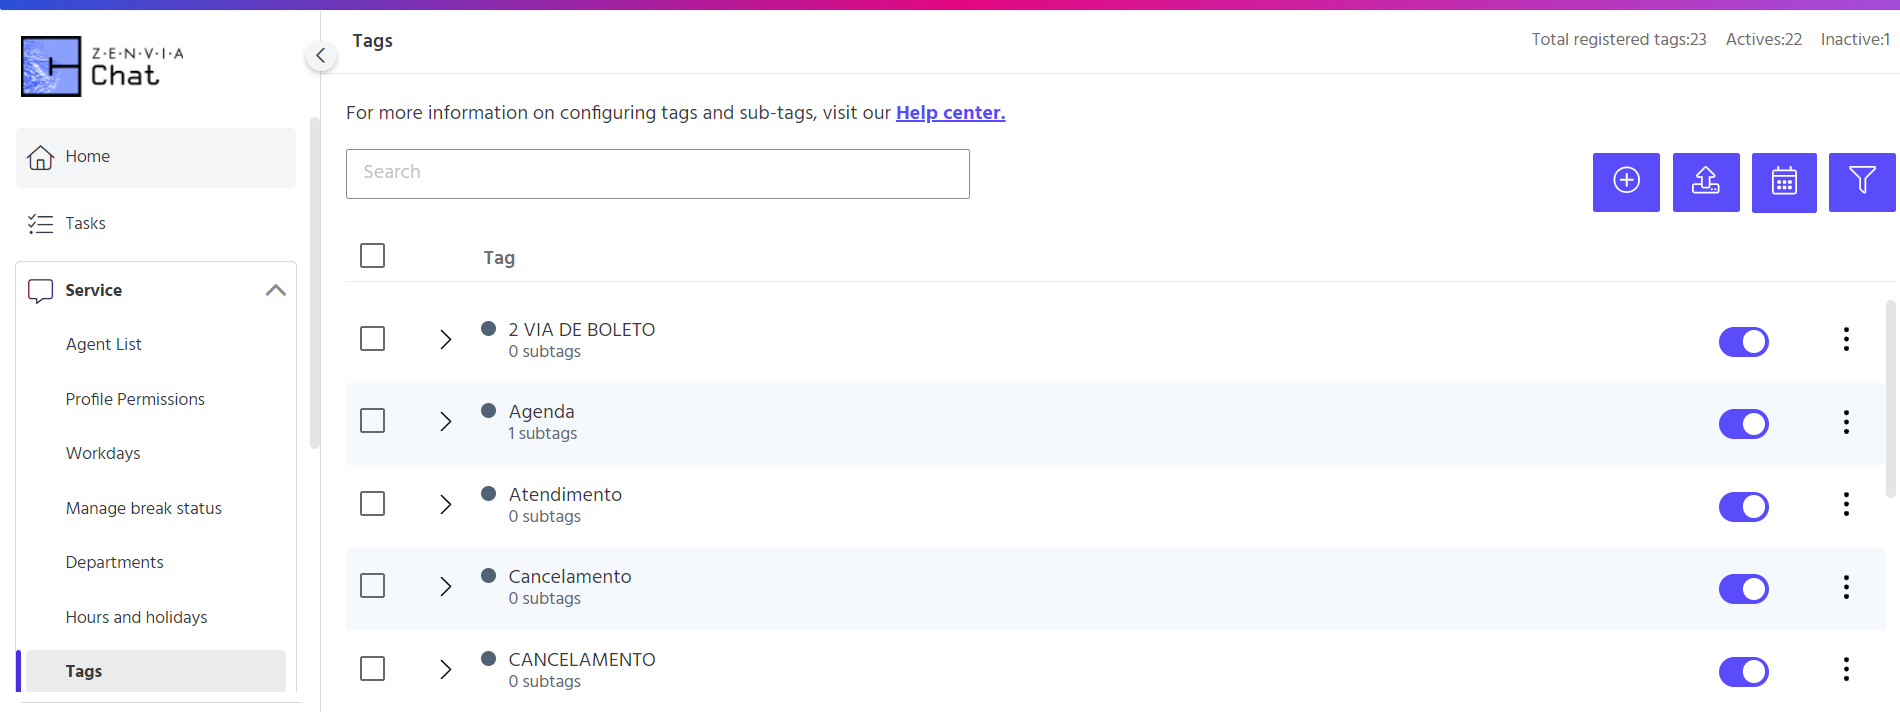
The Tags feature is used to classify a call. You can create up to two levels of subtags for each tag. Thus, a main tag can have several subtags which in turn support more subtags. With this feature, you can identify your company's main demands.
To access it, go to Zenvia Chat - Administrator Profile > Service > Tags.
You can use tags in a variety of situations, for example to send a 2nd copy of a boleto. Imagine that your company has a large number of customers requesting 2nd copies of boleto. In order to measure this volume of requests, you could create a tag called "2nd copy of boleto" and then monitor the volume using reports.
This allows corrective measures to be taken if the number is indeed high. In addition, as a call can have more than one reason, it is possible to insert several tags during the interaction.
⚠️ Attention: Tags are only created/edited by Administrator profiles, agents who are responsible for linking tags to a call.
Tag creation
To create new tags, simply click on the icon in the top right-hand corner of the screen. This will take you to the screen where you can fill in the data, as shown in the image below. Indicate the tag, its color and the departments that will use it. Then click on Save. After filling in the data, the new tag will be added to the list, as shown below.
Creating subtags
To add a subtag, expand the main tag and click on the button. A text box will appear, in which you only need to fill in the name, as the color and department will be inherited from the main tag.
After this step, click on the confirmation button to complete the subtag creation process. To create a third-level subtag, the process is very similar. Here's an example: Click on Add subtag and enter the name that will be used in the text box.
Finally, click on the confirmation button to finish.
Edit Tag
To edit a main tag, click on the icon located in the right-hand corner of the desired tag, a set of options will be displayed, select the Edit option, as shown below. A window will appear with all the information on the main tag, edit the fields as desired and click Save.
💡Tip: When you change the color or departments of the main tag, all the subtags will inherit this change.
Edit the tag or subtag name
If you only want to edit the name of a tag or subtag, just double-click on the name you want to change. Finally, click the Confirm button, otherwise click the Cancel button to close this field and undo the changes.
You can also edit by clicking on the icon in the right-hand corner of the tag you want to edit.
Editing the status of a tag or subtag
To activate or deactivate a tag or subtag, simply click on the location of the tag or subtag. If the tag or subtag you want to inactivate contains other subtags below it, a confirmation message will be displayed. To inactivate the tags, click Inactivate, otherwise click Cancel to close this window and undo the changes.
⚠️ Attention: After confirming this message, the subtags will also be inactivated and it will no longer be possible to make any changes or add new subtags below the tag that has been removed.
Search Tags
To search for a specific tag, you can use the following filters:
-
Filter by name;
-
Filter by creation date;
-
Filter by creating agent;
-
Filter by department;
-
Filter by status.
We'll go through each of them in detail below.
Filter by name
To filter tags by name, simply fill in the search field at the top of the screen and press Enter to apply the filter and perform the search.
You can search using the exact or approximate name.
Filter by creation date
To filter the tags by creation date, click on the calendar icon in the top right-hand corner, then select the desired date or period and click on Filter by period to apply the filter.
Filter by creator agent
Tags and subtags
To filter the tags by creating agent, click on the icon in the top right-hand corner, then select the desired agent and click on Filter.
Filter by department
To filter the tags by department, click on the icon in the top right-hand corner, then select the department you want, and click on Filter.
Filter by Status
To filter the tags by status, click on the icon in the top right-hand corner, then select the desired status and click Filter.
Importing tags
Zenvia Chat also allows you to import tags in bulk using the .
⚠️ Attention: Please note that only top-level tags can be imported.
It is essential that the format of the imported file is .CSV and that the header of this file is sorted correctly, as shown in the instructions. Here's an example: Select the file by clicking Click here to search for the file. As shown in the image below. Finally, click on Import.
Deleting tags and subtags
To delete a tag or subtag, click on the icon in the right-hand corner of the desired tag and select Delete.
When you select this option, a confirmation window will appear. To delete, click Delete, otherwise click Cancel to close this window and undo the changes.
⚠️ Attention: When you confirm the deletion of a tag that contains subtags, these will also be removed.
Deleting multiple tags
To delete several tags en masse, select the checkboxes located in the left-hand corner of the tags and click on the Trash icon that will be displayed in the bottom right-hand corner, as shown in the image below.
A confirmation window will appear, to delete click Delete, otherwise click Cancel to close this window and undo the changes.
When you confirm the deletion of a tag that contains subtags, these will also be removed.
Detail
Clicking on Detail will open a screen with various information, such as: Tag, Agent, Departments, Date, Use, Status, Subtags.
That´s it! Detail process done.