Users are people who will effectively access and use Zenvia Customer Cloud. They can be assigned to service groups as needed.
⚠️ Attention: Only users with the Admin profile can create and manage organization users.
Types of user profiles
Each user must be linked to a profile that defines their access permissions. Check the access permissions for each profile type.
Adding new users
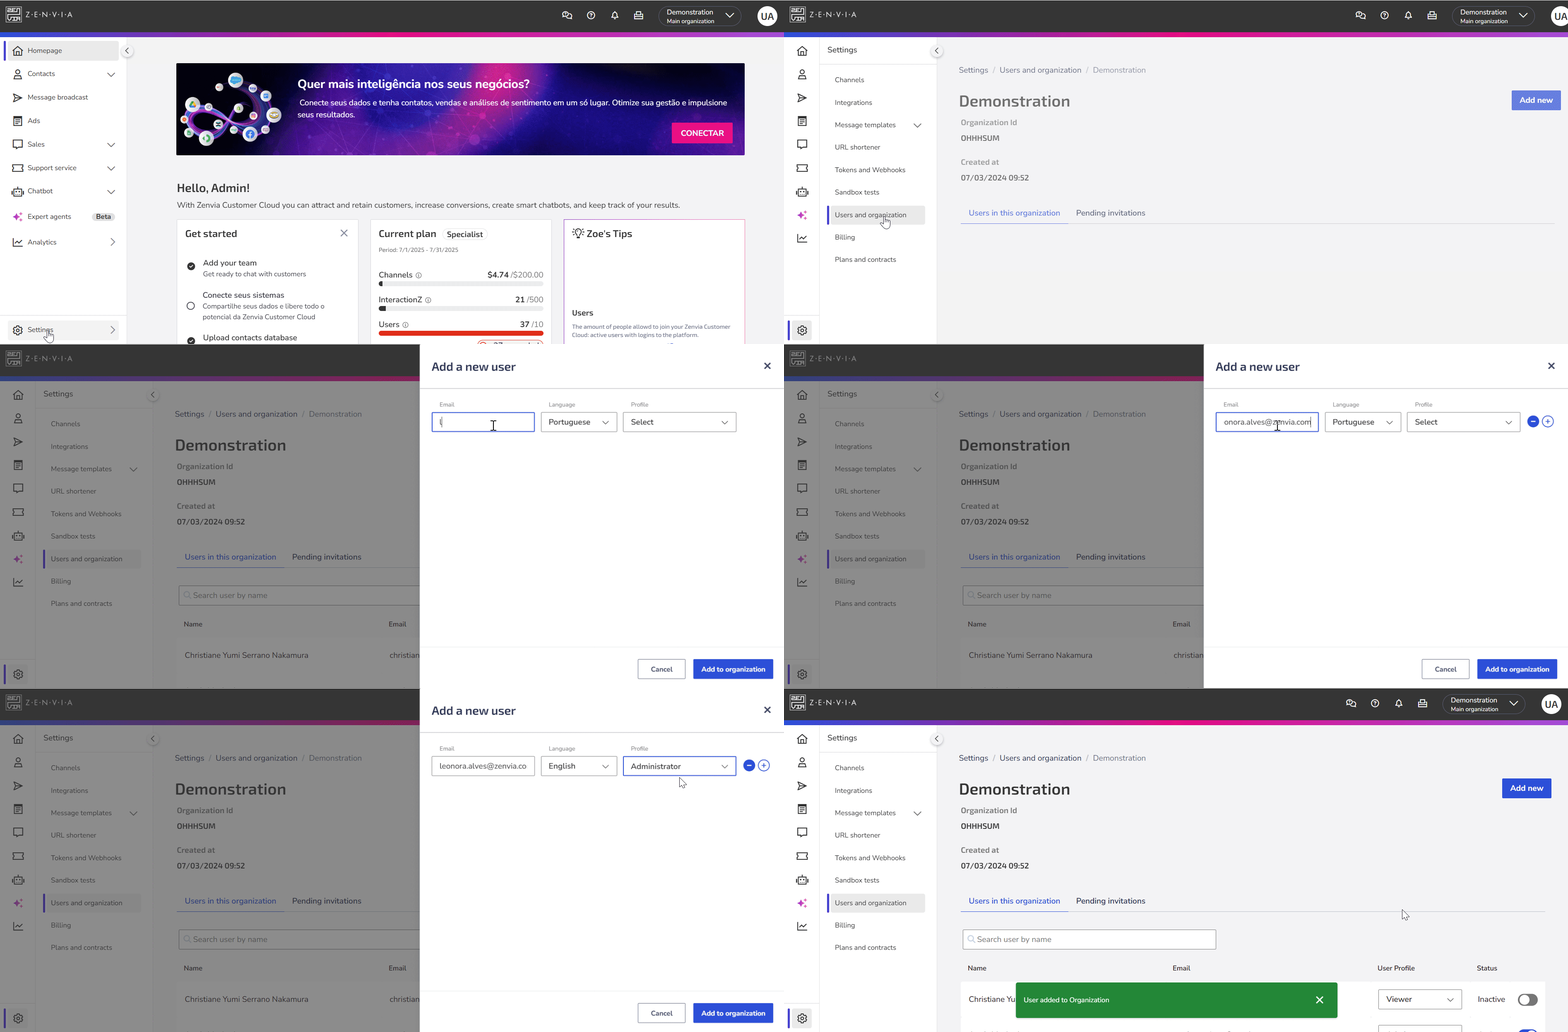
To add users to an organization, make sure you are logged in to the organization:
In the side menu, go to Settings > Users and organization;
In the Users tab of this organization, click the Add new button;
Enter the organization, email, language, and profile type.
Click Add to organization. The user will receive an email with instructions.
If the number of active users exceeds the number of users contracted in the plan, a fee will be charged for each additional user.
Sending an invitation to the registered user
After registration, an invitation email is sent to the user, valid for seven days. Pending invitations appear in the Pending Invitations tab and can be resent.
How it works for the user receiving the invitation:
A user who has already been registered in other organizations receives an email and must accept the invitation to gain access to this organization. Upon accepting the invitation, the user is immediately taken to their default organization, but can switch organizations whenever they want.
If it is the user’s first access, they must accept the invitation and create an account.
Users and service groups
After adding users, you can associate them with specific service groups.
To manage sales groups:
- Go to Sales > Settings > Support groups.
- The added user will automatically be assigned to the organization's main group. To change an agent's group:
Learn more: Check out how to configure sales groups.
⚠️ Attention: The creation of sales groups is done by our support team. Please contact us to request this.
To configure support groups:
- Go to Customer Support > Settings > Support settings.
- In the Support groups section, click on Manage.
- In the options
of the desired group, click on Edit.
- Select the agents who will perform the support in the indicated field.
- Click on Save Group to finalize the change.
Learn more: Check out how to configure customer support groups.


