By enabling the WhatsApp channel you allow all messages sent to the contracted number to reach Zenvia Chat.
WhatsApp is one of the world's most popular instant messaging platforms, allowing users to exchange text messages, voice and video calls, share media and documents. WhatsApp stands out for its simplicity of use and global reach, making it an essential tool for personal and business communication.
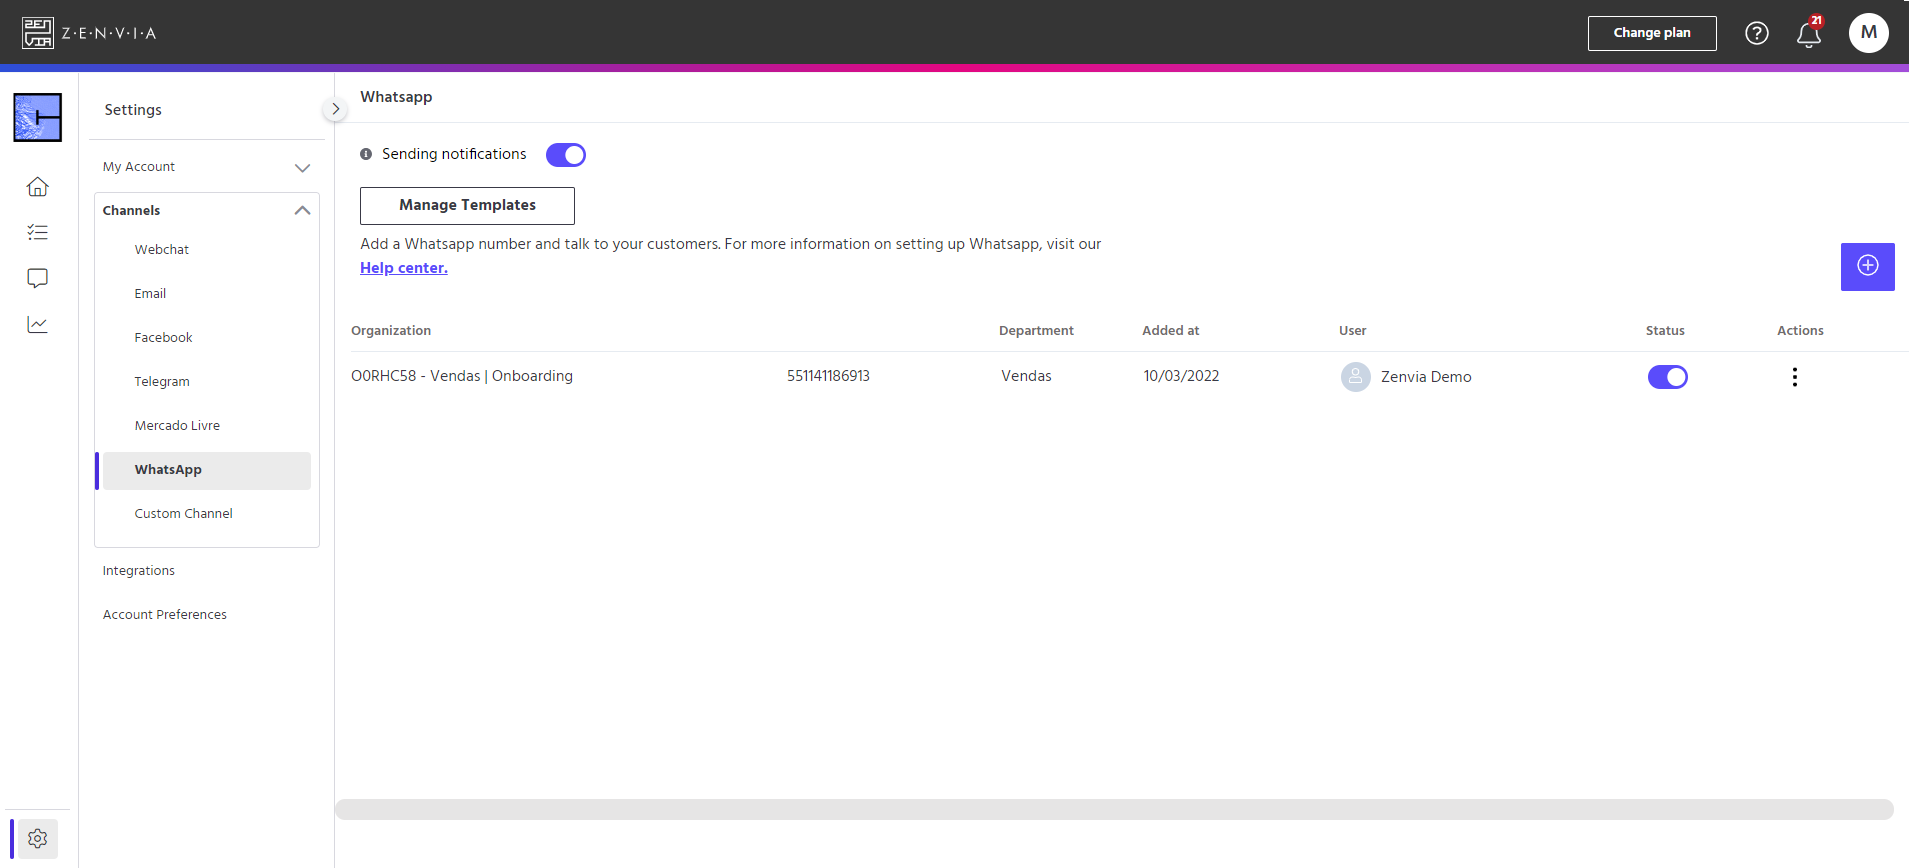
To access this channel, go to Zenvia Chat - Administrator Profile > Settings > Channels > WhatsApp.
Click on the + button in the top right-hand corner to add a WhatsApp number to your account.
If you already have a contracted WhatsApp Business number, you will be asked for your WhatsApp ID, i.e. the number you want to enable in Zenvia Chat, as well as the department it will be associated with. Don't worry, although it is associated with a single department, you can use this number for other existing departments.
Once you have made these settings, your number is already integrated into Zenvia Chat, so messages sent to it will already reach the agents.
After integrating Zenvia Chat with the WhatsApp number, some quick information appears on the screen.
- Organization created on Zenvia's Communication Platform, associated with your Zenvia Chat account;
- WhatsApp number integrated with Zenvia Chat, to which messages will be sent and answered;
- Default department associated with this number;
- Date on which the number was integrated with Zenvia Chat;
- User responsible for carrying out the integration;
- Status - Active or inactive;
- Options: 1 - WhatsApp details, 2 - Possibility of creating simple automations or 3 - Exclude integration with this number in Zenvia Chat.
If you don't yet have a WhatsApp Business number, you can use the Sandbox features to create a test number and simulate service. To find out more about the rules of the Sandbox and its limitations, contact your Sales Executive or our service team.
Without a WhatsApp Business number, after selecting the + button, you will have the option of creating a test number by simply scanning the QR code displayed or directly sending the keyword in bold to the number defined.
WhatsApp details
By clicking on Options > WhatsApp Details, you can view the following information:- Name of the organization created on the Zenvia Communication Platform, associated with your Zenvia Chat account;
- Organization ID;
- Date the number was integrated with Zenvia Chat;
- Type of number (test account - Sandbox - or WhatsApp Business).
Then there is the general information, which shows the active WhatsApp number and the department with which that number is associated.
Finally, there's the message automation section. If a flow has already been created, a summary of what has been configured will appear, and it will be possible to edit or delete the flow created, a summary of what has been configured will appear, allowing you to edit or delete the automation. If there is no flow yet, the option to create the automation will appear.
Message automation
Automation creation/editing is divided into six steps.
- The first step defines the name of the simple automation created and also allows you to determine whether the name of the administrator and that of the agent will appear to the user during a call.
- The second step allows you to configure a welcome message. This will be sent to the end user when they contact your operation.
- The third step is responsible for collecting the user's personal data. You can define what information will be collected (name, e-mail and CPF are the possible data - the telephone number is collected automatically), as well as how this data will be requested. In addition, Zenvia Chat recognizes numbers that have already contacted the company and, in these cases, the information stored in the database is shown. A confirmation is also requested. If so, the data will not be requested again. If the user does not recognize the data displayed, they will be asked for the information again.
- The fourth step is for you to determine which of your existing departments will take part in the automation, as well as defining the message that will be passed on to the user when defining which department they wish to speak to.
- The fifth step allows you to define the message that will be sent to the user when they contact you outside of office hours. There is also an option to enable the recording of customer messages. If this option is not checked, calls made outside operating hours will be terminated. If the option is enabled, the calls will go into the queue and can be attended to when an agent is available.
- The sixth and final step allows you to define a message that will be sent to the user when the service is transferred to an agent.
All the steps described above are optional. When you edit each one, you can see a preview on the right-hand side of the screen.
By clicking on Manage templates, you are taken to Zenvia's Communication Platform to create/edit your WhatsApp templates.
That´s it! WhatsApp channel integration stage completed.