A satisfaction survey is a tool for you to discover how happy your customers are with the help they received from your chatbot.
With the responses, you will understand what your company can do to serve your customers even better.
In Customer Cloud, it's possible to create a flow chatbot and include questions in it to find out the satisfaction level of your customers.
Let's learn an easy way to put a satisfaction survey in your chatbot.
Measuring Satisfaction with NPS
NPS (Net Promoter Score) is a type of satisfaction survey and a widely used metric that helps measure how satisfied your customers are and if they would recommend your company to other people.
How it works: The customer answers a question, for example: "On a scale of 0 to 10, how likely are you to recommend our company to a friend?". The number 0 means "not at all likely" and the number 10 means "extremely likely".
How to set up the NPS satisfaction survey in your chatbot
First, choose which chatbot you want to add the survey to. Make sure that chatbot's editing screen (the builder) is open to follow the steps. It is recommended to place the survey at the end of the conversation or after an important moment of service.
On your chatbot's editing screen, find and click Add block. Think of the block as a step in the chatbot's conversation.
Within the add block options, click Add content and then Satisfaction survey. This will insert a block of satisfaction questions into your flow.
In the Question field, you will see a standard question. You can change this question to whatever you prefer or leave it as is. The standard model is: "On a scale of 0 to 10, how likely are you to recommend our services?"
To end the conversation after the survey, create a new block. Click Add block again and then Add content. Choose the End of conversation option.
Write a thank you message in this block, such as: "Thank you for your response! Your opinion is very important to us."
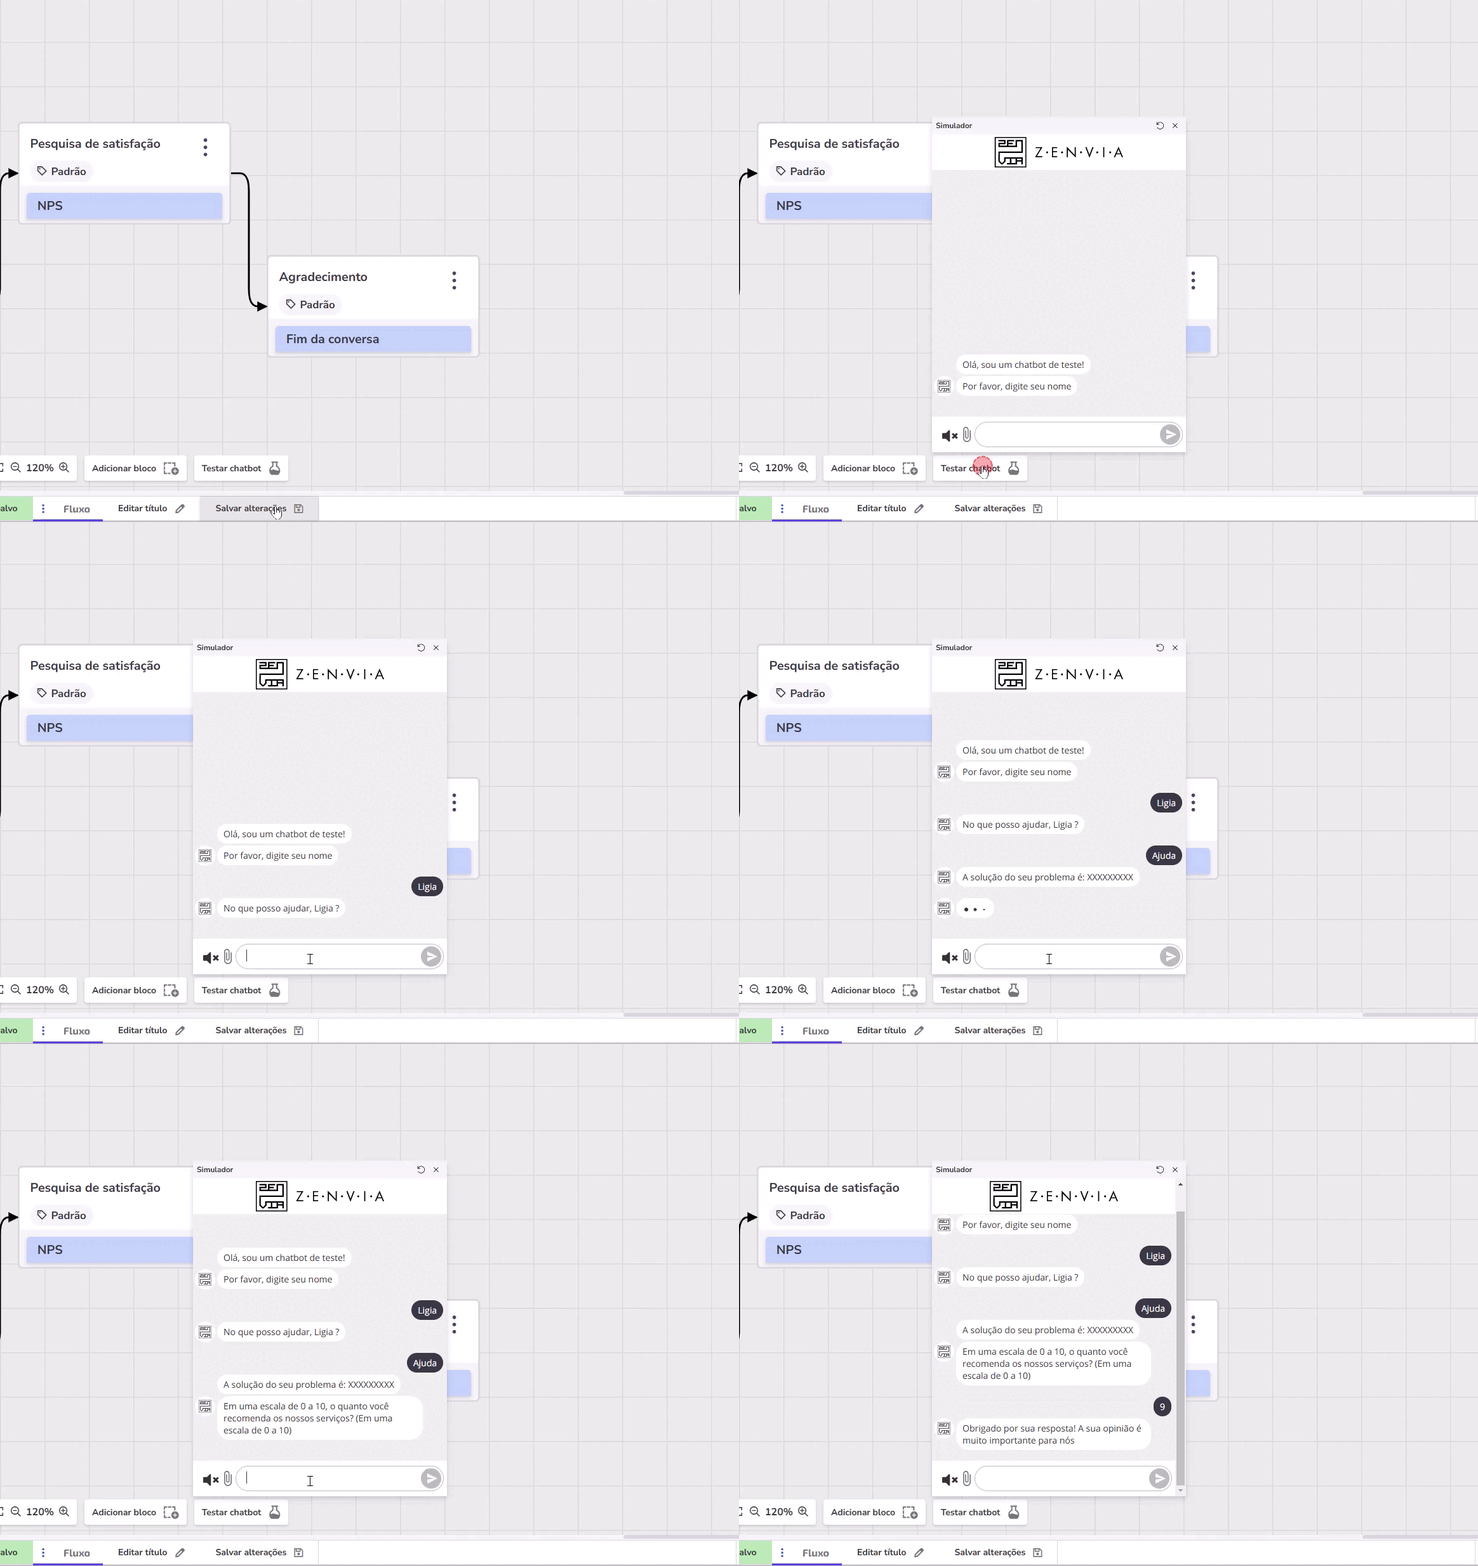
Now, you need to connect the survey block to the thank you block. In the survey block settings, look for the Destination option and select the thank you block you just created. This way, after answering the survey, the customer will receive the thank you message.
Your survey flow should look similar to this example:
How to understand and use the survey results
After people respond to the survey in your chatbot, the next step is to understand what the answers mean and how you can use this information to improve your customers' experience.
NPS responses are divided into three groups:
Promoters (scores 9 and 10): These are very satisfied customers who are likely to speak well of your company to other people.
Passives (scores 7 and 8): These are customers who are satisfied, but may not enthusiastically recommend your company.
Detractors (scores 0 to 6): These are customers who are not satisfied and may even speak poorly of your company.
To find out your NPS, you need to calculate the percentage of promoters and the percentage of detractors. Then, subtract the percentage of detractors from the percentage of promoters. The result can range from -100 to 100. The higher the number, the more loyal customers your company has.
Analyzing with the Quality Monitor
In Customer Cloud, you can use the Analytics area to see your survey results in an easy-to-understand way.
The Quality Monitor is like a dashboard that shows the most important information about your chatbots.
To learn more details about how to analyze your chatbot data, you can consult the Chatbot Analysis article in Zenvia Customer Cloud.

