Email message templates allow you to send personalized communications to your customers, automating processes and optimizing customer interaction.
You can create email templates to use in marketing campaigns through the Message Sending module of Zenvia Customer Cloud. These templates can be used for both mass messaging and automations.
This guide provides step-by-step instructions for registering new templates, editing existing ones, and ensuring everything works correctly.
Prerequisites
Before you begin, make sure the email channel is integrated with your account in Zenvia Customer Cloud. This integration is required in order to create and send message templates.
Accessing email templates
Go to Settings > Message templates > Email
On this screen, you will be able to:
Managing existing templates
Use the search or filters to locate already registered templates. The list will show:
- Template ID
- Name
- Status
- Last updated
In the options menu for each template, you can:
- Edit template: Modify the content and settings of the existing template.
- Copy JSON: Retrieve the template’s JSON code to use in other integrations or systems.
- Copy Template ID: Copy the unique identifier of the template for reference or use in other parts of the system.
- Duplicate template: Create an identical copy for customization (ideal for reusing templates with small changes).
- Delete template: Remove the template from the system if it is no longer needed.
| Dispatch Report When clicking on Dispatch Report, a CSV file is generated with a summary of message traffic by template for a selected month. This report contains:
The file can be opened in Excel or Google Sheets. |
Create new email template
Click Create new template and fill in the following fields:
Step 1: Settings
- Template name: A unique and identifiable name (no special characters or numbers). E.g.: boas_vindas, atualizacao_pagamento.
- Language: Language of the message content.
- Sender email address: Must be preconfigured.
- Notification email: Address to receive updates about the template.
- Category: Define the purpose of the template (e.g., Marketing or Others).
Click Next to proceed.
Step 2: Message type
Choose between:
- Message with subject, body, and attachments;
- Message using email builder: visual interface to build the message using blocks.
💡 Tip: The builder helps streamline the creation and customization of the email body.
After choosing, click Next.
Step 3: Template content
In this step, define the content:
a. Subject – Optional
Define the subject line that will appear in the recipient’s inbox. This field allows uppercase and lowercase letters, accents, and spaces.
Numbers and special characters such as _ , - , ! , @ , # , etc. are not allowed.
Valid subject examples include: Welcome to our community; Update available for your plan; Your order has been successfully shipped.
b. Message body
Mandatory field where you define the main content of the email. The way to fill it varies according to the type of message selected in the previous step:
- Message with subject, body, and attachments: Type the text directly into the available field or paste a custom HTML code. It is also possible to import an external HTML file.
- Email builder: Drag the available visual blocks (such as image, text, button, etc.) to build the message body in a practical and visual way. Learn how to use the email builder.
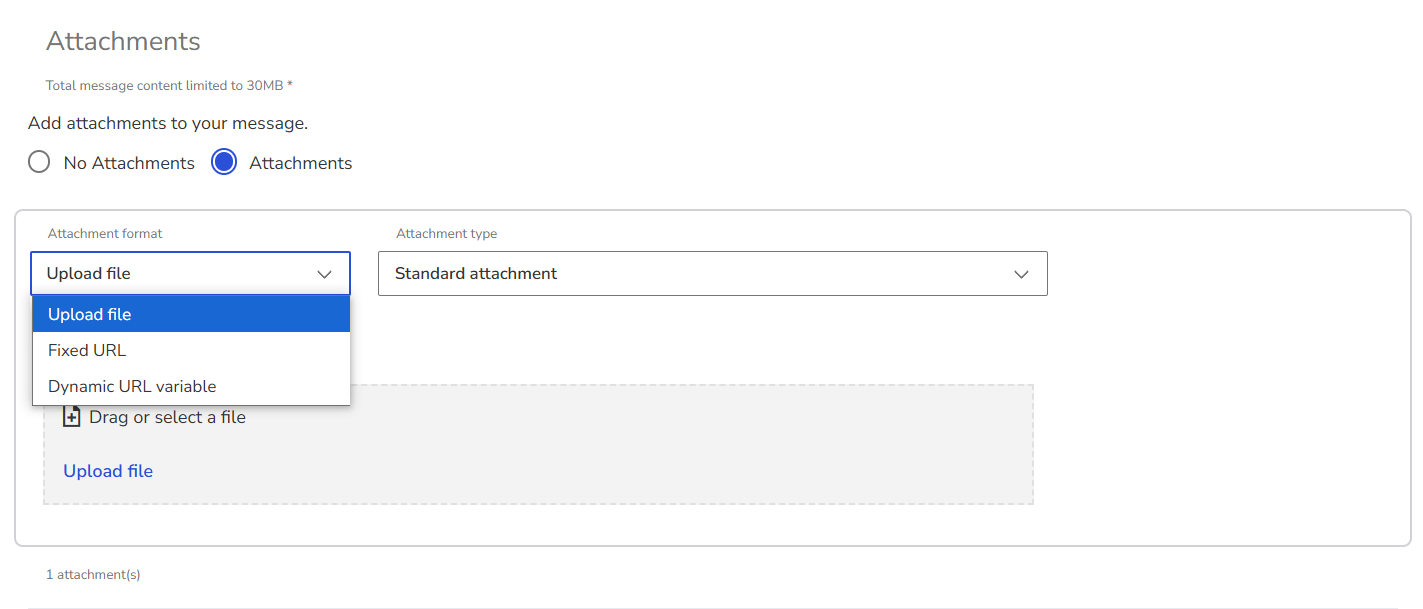
c. Attachments - Optional
The total attachment limit per message is 30 MB, considering all files sent.
Attachment formats:
- Upload file: Upload a local file directly.
- Fixed URL: Insert a direct public link to the file.
- Dynamic URL variable: Use a variable that will be replaced by a personalized URL for each recipient during the campaign sending.
Attachment types:
- Standard attachment: The file is simply attached to the email.
- Inline attachment: The file is displayed inside the email body (usually used for images, icons, etc.). Requires the use of an identifier called CID (Content-ID), which must be referenced in the HTML code of the message body so that the content appears visually embedded.
Example of use in HTML: <img src="cid:my_logo">
In this case, the CID "my_logo" must be the same as the one registered for the inline attachment.
Combining attachment formar with attachment types
| Attachment format | Attachment type | What to do |
|---|---|---|
| Upload file | Standard | Select or drag the file directly in the interface. |
| Inline | Provide the CID (unique identifier of the attachment) and select or drag the file. The CID will be used in the body HTML. | |
| Fixed URL | Standard | Insert the public URL of the file (PDF format is recommended). |
| Inline | Provide the CID and the file URL. The CID will be used in the HTML to display the content inside the message. | |
| Dynamic URL variable | Standard | Insert the variable name, such as file_variable_1. The URL value will be mapped during the campaign sending step, when the spreadsheet with recipients and personalized links is imported. |
| Inline | Provide the CID and the variable name. The variable value will be dynamically replaced for each recipient during sending. |
d. Reply-to (responses) - Optional
Alternative email where replies will be forwarded.

Variables in the template
Variables are custom fields that will be automatically filled with customer data. The URL value will be mapped during the campaign send setup.
Format: {{variable_name}}
Example:
Hello, {{name}}! Welcome!
Finish and preview
⚠️ Attention: If you receive the error message "Sorry, we couldn't save your template" when completing the message template registration, check the following points:
|
Click Message Preview to see the final message. Then, click Finish to automatically create and approve the template.


