In this article, you will learn how to create, edit, duplicate, and delete Support Service tickets in Zenvia Customer Cloud.
Tickets have customizable Panels and Views. The conditions and columns you set for your tickets can alter the available fields.
Create a New Ticket
1. Go to Support Service > Tickets.
2. Click New Ticket.
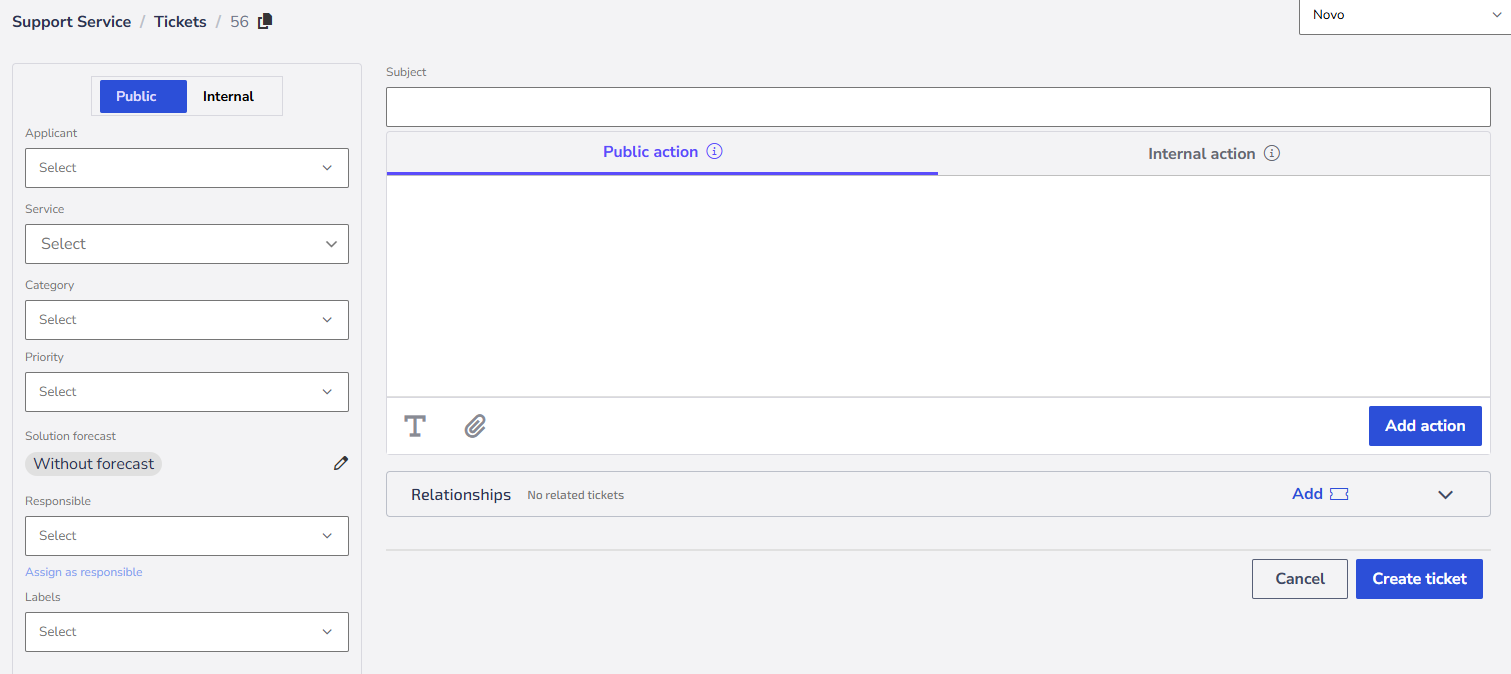
3. Choose whether the ticket will be Public (visible to customers) or Internal (visible only to agents).
4. Fill in the available fields, such as:
- Requester;
- Service;
- Category;
- Priority;
- Solution Deadline;
- Responsible;
- Tags;
- CC.
5. Enter the Subject and Action (Public or Internal).
6. Click Create Ticket.
Done! Ticket successfully created.
💡Tip: The fields Requester, Subject, and Add Action are mandatory.
Edit a Ticket
1. Go to Support Service > Tickets.
2. Select the desired ticket.
3. Edit the necessary fields, such as:
- Requester;
- Service;
- Category;
- Urgency;
- Solution Deadline;
- Responsible;
- Tags;
- CC;
- Subject;
- Add Action;
- Relate Tickets.
4. Save the changes.
Done! Edits successfully completed.
Duplicate a Ticket
1. Go to Support Service > Tickets.
2. Select the desired ticket.

3. Click Options in the upper right corner.
4. Click Duplicate Ticket.
5. Choose the Actions to be copied to the new ticket:
- All;
- First and last only;
- First only;
- Last only;
- None.
6. Click Duplicate.
7. Fill in the fields for the new ticket, such as Subject, Requester, etc.
8. Click Create Ticket.
Done! Ticket successfully duplicated.
Delete Tickets
Individually
1. Go to Support Service > Tickets.
2. Select the desired ticket.
3. Click Options in the upper right corner.
4. Click Delete Ticket.
5. Confirm the action by clicking Delete.
Mass Deletion
1. Go to Support Service > Tickets.
2. On the Ticket View screen, select one or more tickets.
3. Click the trash icon.
4. Confirm the action by clicking Delete.
Done! Tickets successfully deleted.
⚠️Attention: Only tickets with a status of Not Completed (New, In Progress, Awaiting) can be deleted. This action can only be performed by Admin and Operator users.