Send bulk WhatsApp messages and maintain the conversation with your clients through human or automated service in Zenvia Customer Cloud.
Specifications
- Supported Channel: WhatsApp. Ensure the channel is contracted and configured in Settings > Channels > WhatsApp.
- Compatible Plans: Specialist, Expert, Professional, and Enterprise.
- Ways to continue service: Commercial Service (human); Support Service (human) or Chatbot (automated). The choice influences where the client will be directed after responding to the sending.
- The transfer is defined during the WhatsApp sending configuration in the Broadcast module.
Transfer WhatsApp sending to Commercial Service
Prerequisite
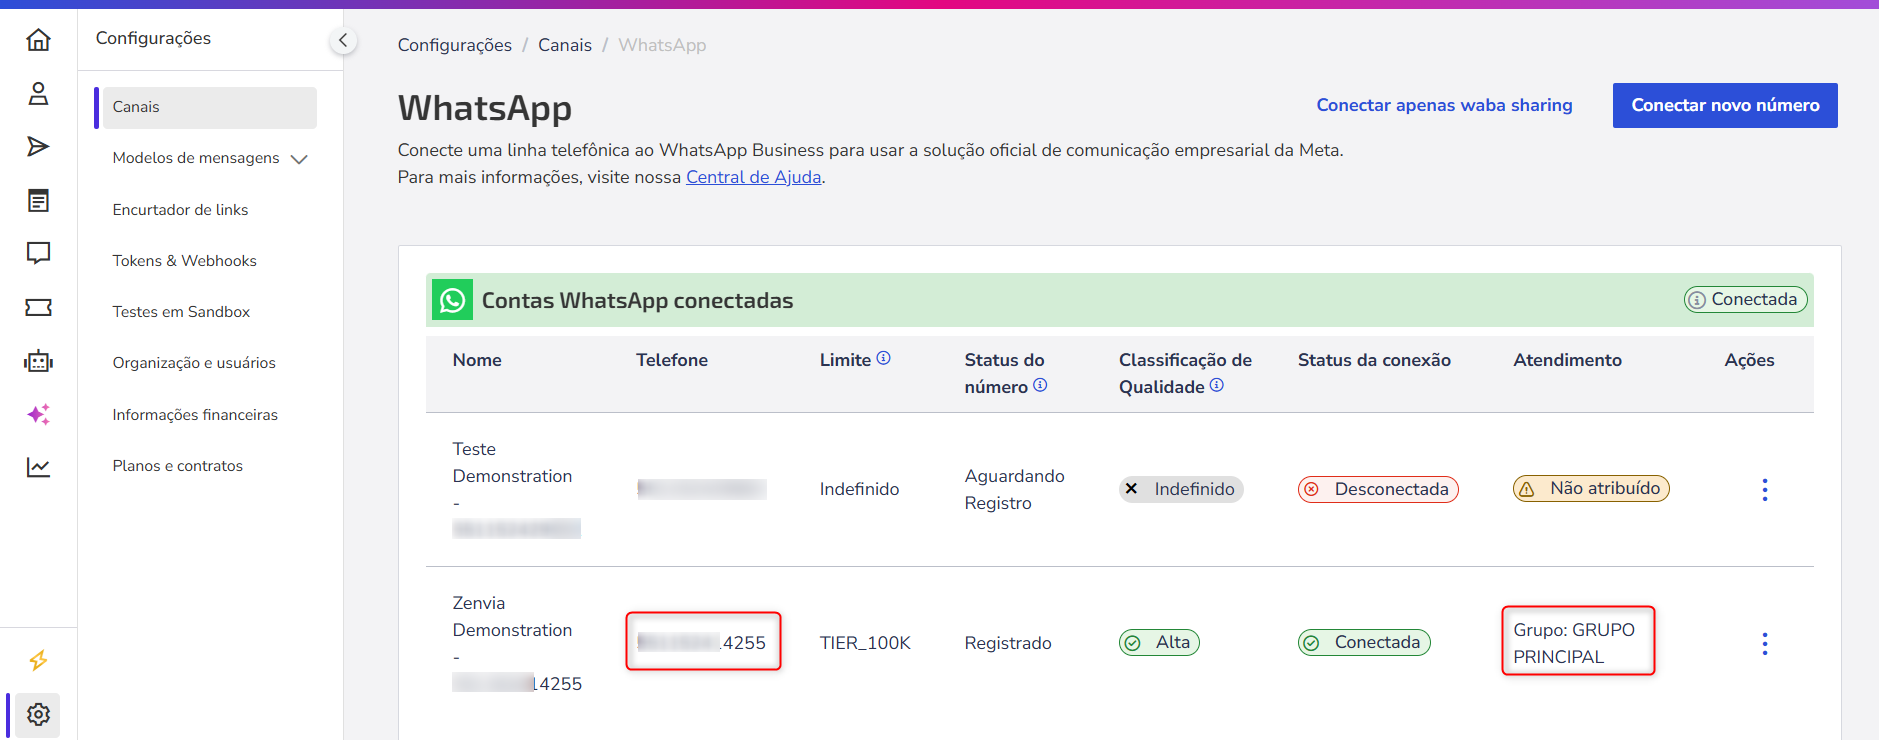
The groups or agents who will receive the interactions need to be linked to the WhatsApp number in Settings > Channels > WhatsApp. Learn how to properly configure the responsible parties: Assign account interactions.
How to configure the transfer to Commercial Service
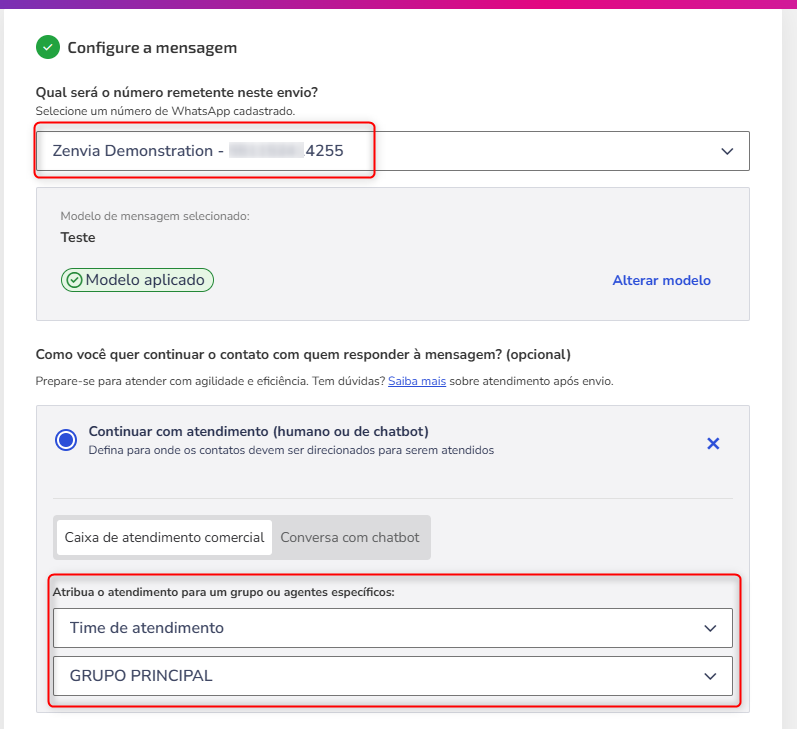
1. Check Continue with service (human or chatbot).
2. Select the option Commercial Service Inbox.
3. Choose the responsible party:
- Service Team: Select one of the configured groups based on the chosen credential. Only one team can be chosen.
- Service Agent: Select one of the configured agents based on the chosen credential. Only one agent can be chosen.
4. Complete the remaining steps of the sending process. For detailed instructions, consult: Send WhatsApp messages in Zenvia Customer Cloud.
How it works after sending
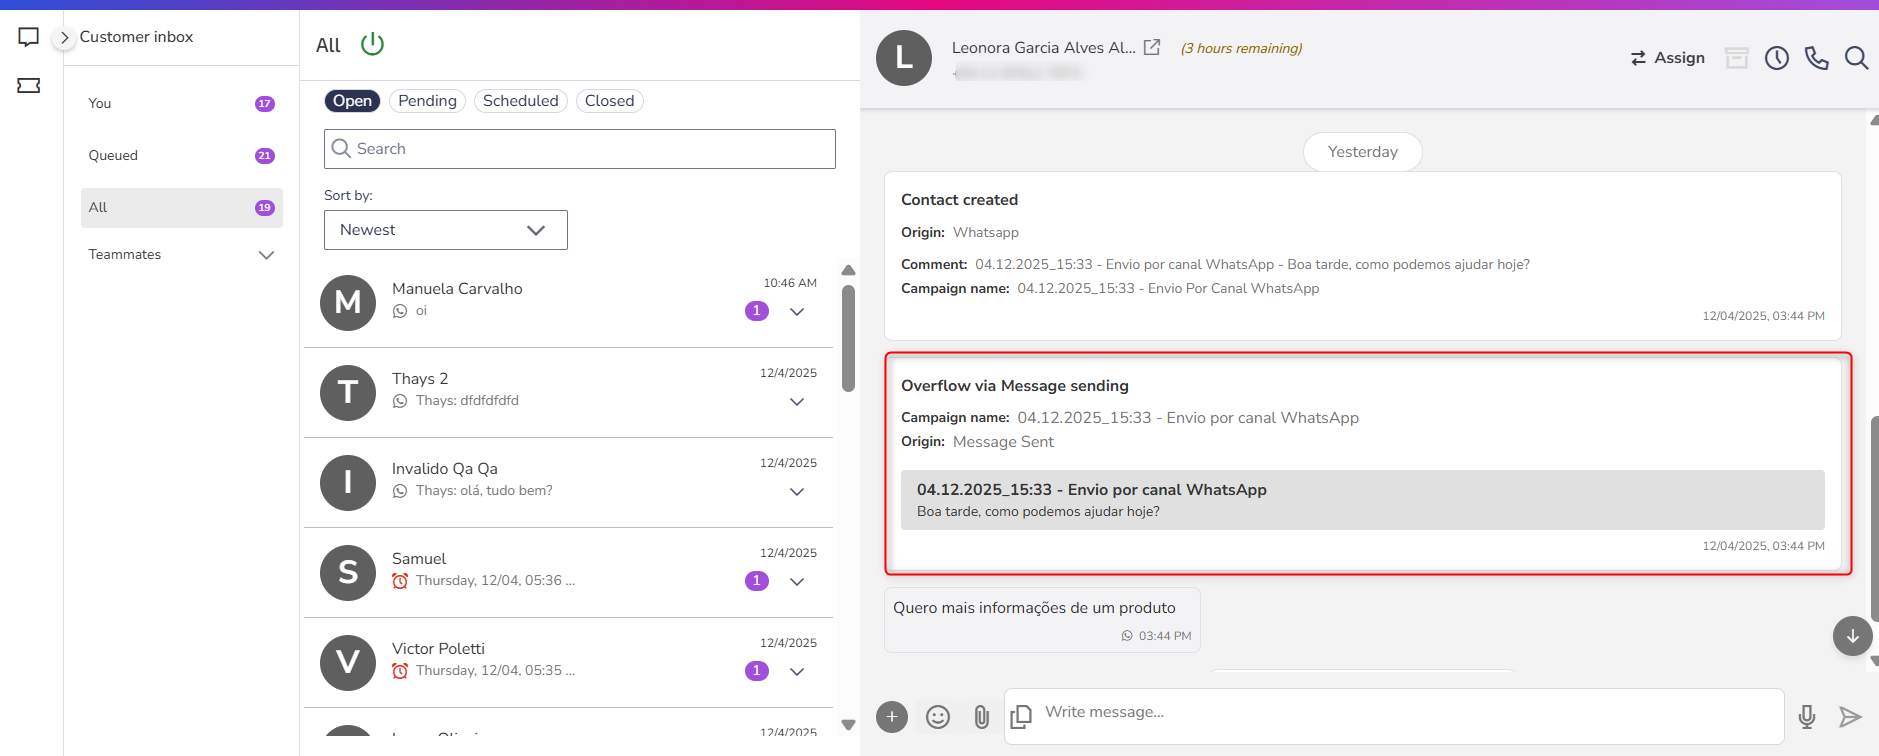
The contacts that respond to your message will be in the chosen responsible party's **Commercial Service > Service Inbox**. The agent receives the contact already accompanied by the journey context - including origin, broadcast identification, and information configured in the sending - to facilitate the continuity of the conversation.
See a practical usage example:Black Friday Promotion: A company sends a promotional Black Friday template to its contact base. When the client responds:
|
Transfer WhatsApp sending to automated service (Chatbot)
Prerequisite
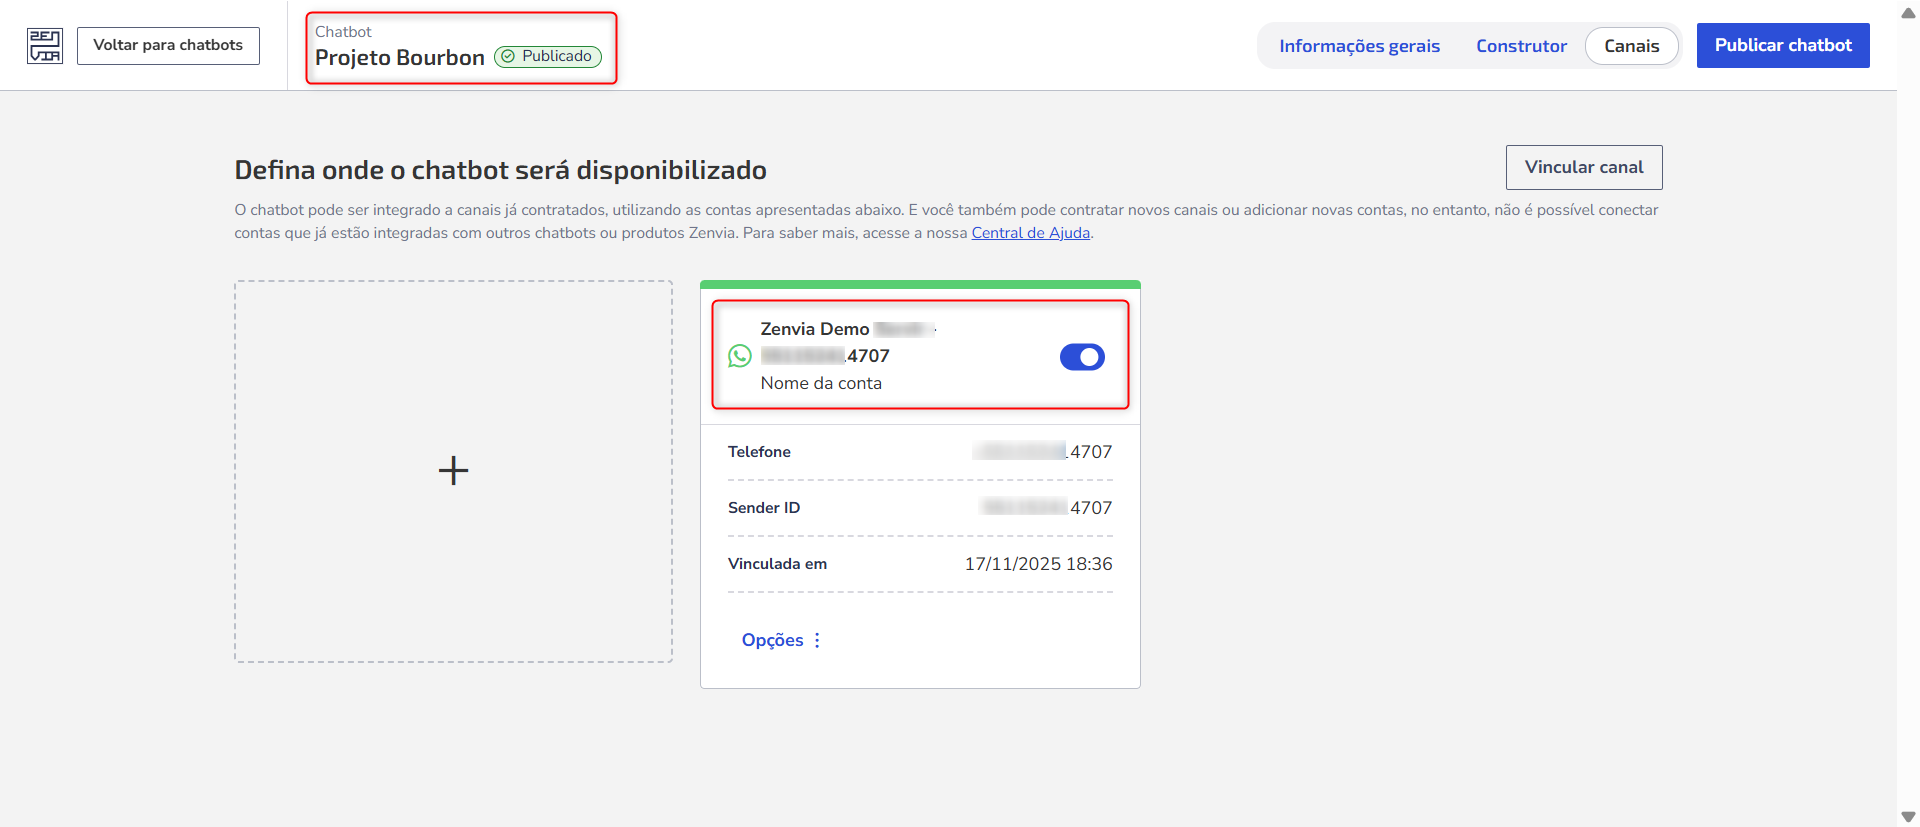
Chatbot linked to WhatsApp: Have a chatbot linked to the same WhatsApp number that will perform the message sending. If the number is already linked to a chatbot, it will be automatically displayed during configuration.
To assign or change the linked channel, access **Chatbot > Chatbot List > select the chatbot > Builder > Channels**. Learn more in: Link a channel to the chatbot.
How to configure the transfer to a chatbot
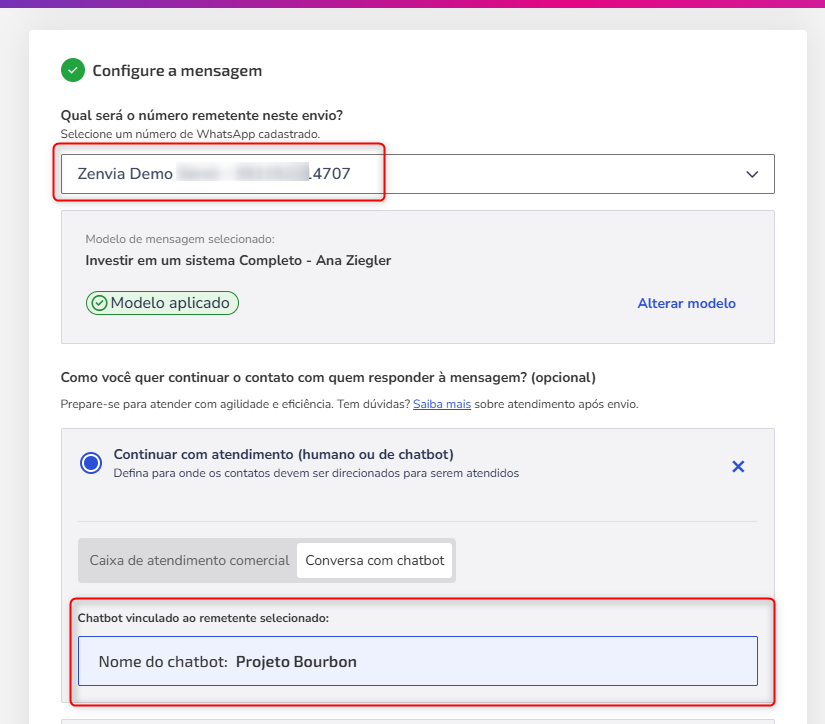
1. Check **Continue with service (human or chatbot)**.
2. Select the option **Conversation with chatbot**.
3. Complete the remaining steps of the sending process. For detailed instructions, consult: Send WhatsApp messages in Zenvia Customer Cloud.
How it works after sending
Upon responding to the message, the client automatically enters the chatbot flow linked to the number used in the broadcast. The bot guides the journey as configured - able to collect data, present options, validate information, and, when applicable, transfer the service to **Commercial Service or Support Service**.
To view the automated service and everything that occurred in the interaction, access **Chatbot > Conversations**. In the list, locate the ongoing conversation and click on **View details**, where it is possible to monitor in real-time all exchanged messages, information captured by the bot, the progress of the flow, and the duration of the interaction. Learn more in Consulting Chatbot Conversations.

See a practical usage example:Questions about products: An online store sends the "Offers Catalog" template via WhatsApp. When the client responds:
Tip: Also see Using WhatsApp template buttons to trigger chatbot flows, where it is possible to transform buttons into direct triggers for |
Transfer WhatsApp sending to Support Service
Prerequisite
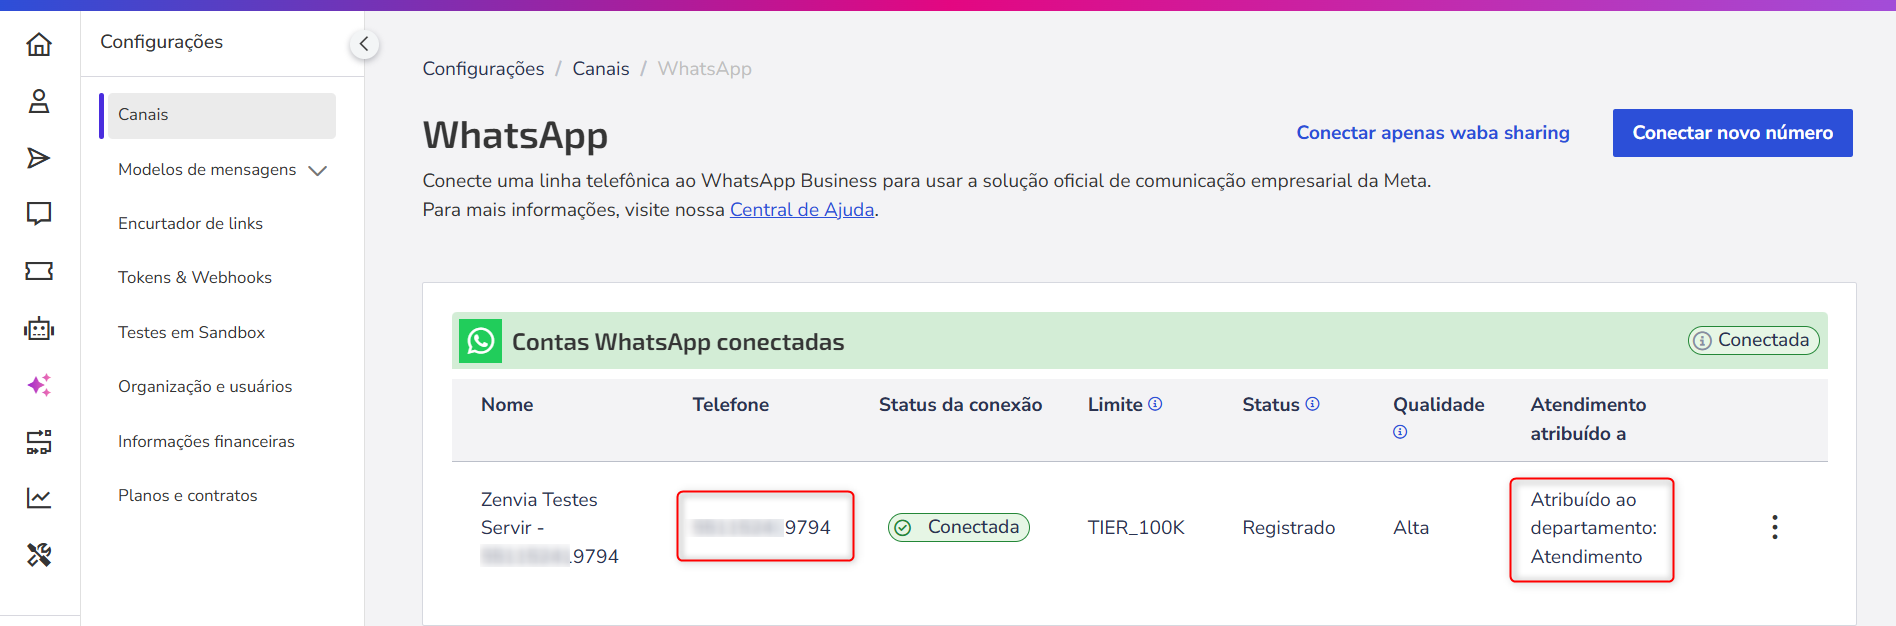
The WhatsApp channel must be assigned to a support department in Settings > Channels > WhatsApp. Learn how to configure it correctly: Assign account interactions.
How to configure the transfer to Support Service
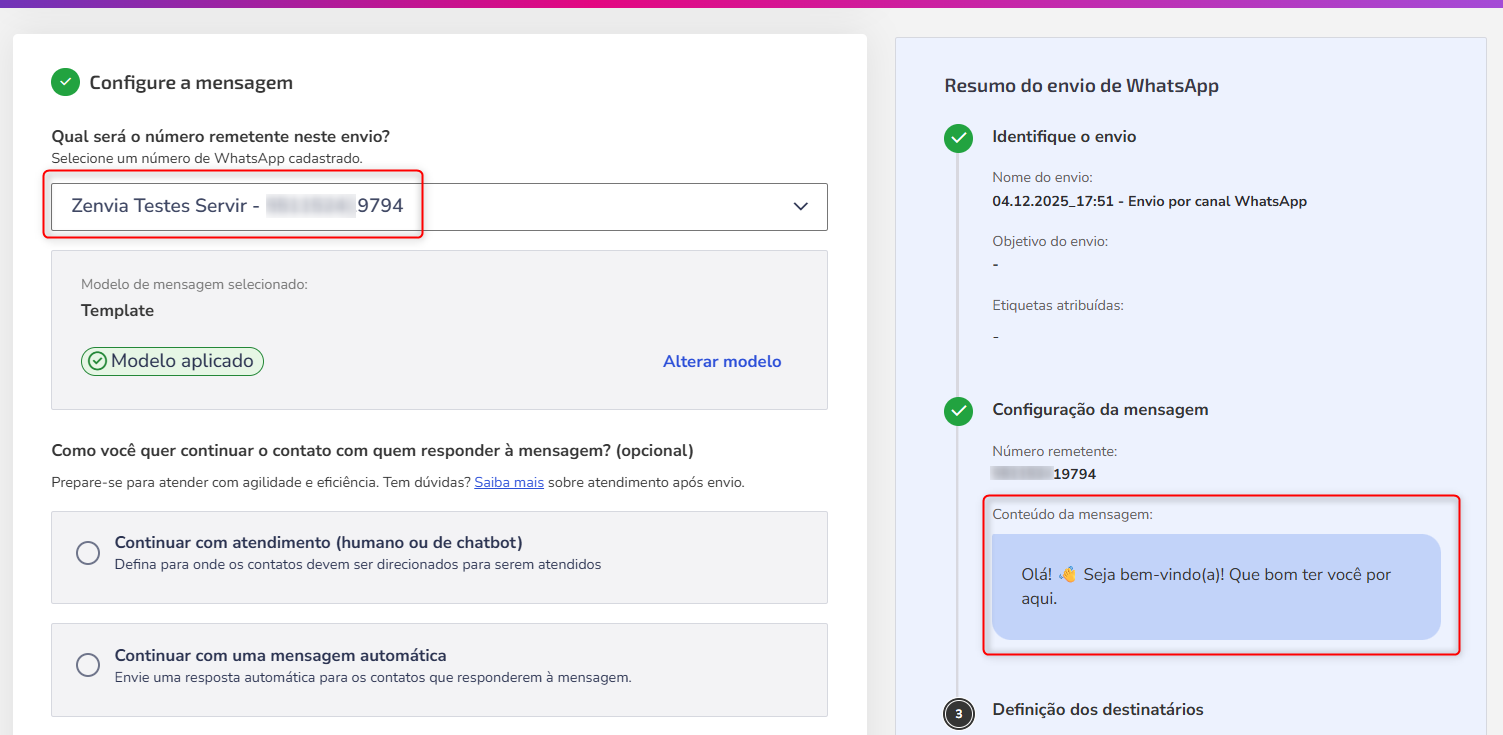
In the message sending, **you do not need to manually select the destination** where the conversation will be sent when the client responds.
The system automatically defines the destination based on the channel configuration. To do this, simply ensure that the WhatsApp channel is configured with **Service Destination = Support Service** and is linked **to a department** of the Support Service.
How it works after sending
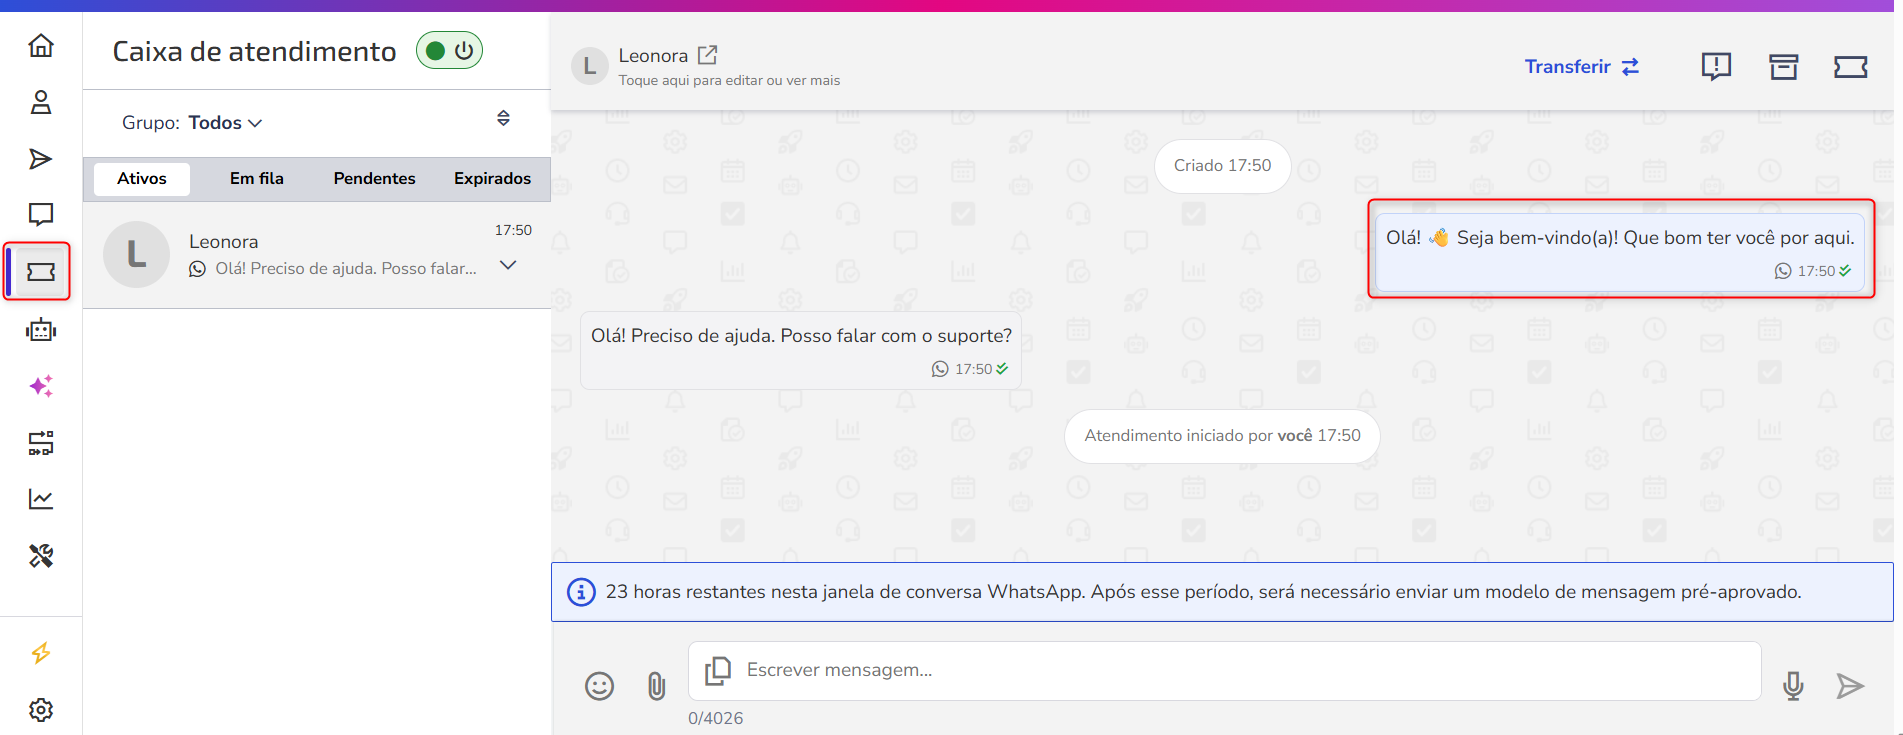
When the client responds to the sending, the conversation will be automatically forwarded to **Support Service > Service Inbox**, falling into the correct queue according to the department associated with the channel.
See a practical usage example:Maintenance notice: A company schedules programmed maintenance and sends a template informing times and impacts. When the client responds with questions:
|