In this article, learn how to access, configure, and export reports to optimize data analysis and obtain detailed information about your service structure in tickets, customer experience, contracts, and values, as well as auditing and control features on the platform.
How Reports Work
Before starting, make sure that the permissions to view reports are enabled in your access profile.
After enabling the permissions, go to Reports, select the desired report, configure the filters and period, then choose whether to view it on screen or export it.
Allow Access to Reports
If a report is not visible, follow the steps below to enable it in your access profile:
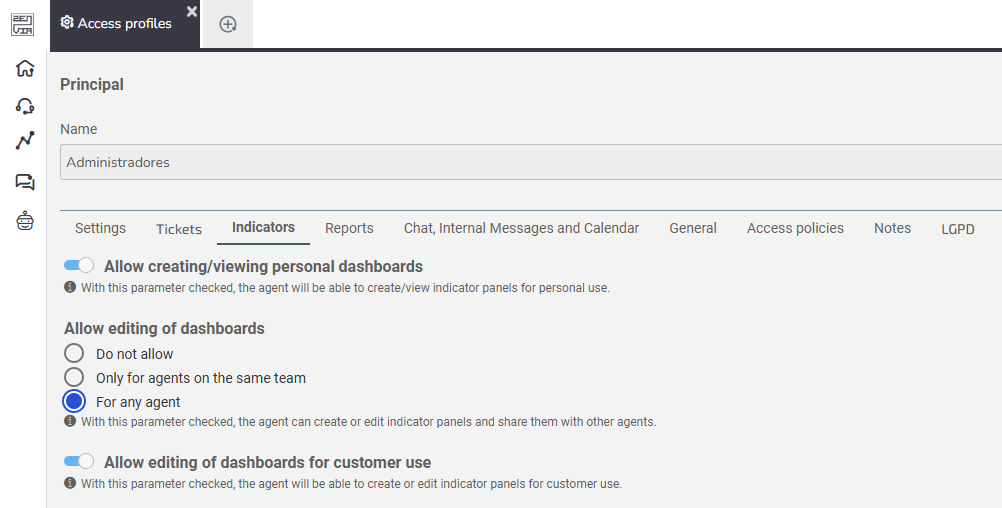
Go to Settings > People > Access Profile.
In the Reports tab, enable the necessary parameters.
Available Parameters
Notes
- View worked time report in tickets: Allows the agent to see the worked time indicated in the tickets.
- View list of Service Reports issued in tickets: Displays all the service reports issued and saved in the tickets.
Satisfaction Survey
- View satisfaction survey report: Displays the responses from surveys sent to customers.
Tickets
- Tickets by customer report: Quantifies the tickets created by each customer within a specific period.
- Summary of tickets by service: Shows tickets classified by service type.
- Time spent by status: Analyzes how long tickets remain in each status.
- Time spent by responsible agent: Evaluates how long each agent kept tickets under their responsibility.
Access Control
- System access report: Monitors client and agent access to the platform.
Configure and Use Reports
Tickets
- In Reports, select How many tickets do I have by customer?
- Configure the filters:
- Period: Select the analysis period.
- Ticket opening or closing: Filter by ticket opening date or closing date if you want to show the total of opened or closed tickets in the report.
- Display: Choose between customers with and without tickets, with tickets, or without tickets.
- Grouping: Choose between tickets grouped by organization or person.
- Other filters: You can filter by service, category, urgency, and classifications.
- Click Generate Report or Export.
- In Reports, select How much time is being spent to close each ticket?
- Configure the filters:
- Period: Select the analysis period.
- Ticket types: Choose between public, internal, or both tickets.
- Other filters: You can filter by agent, activity, status, customer, and classifications.
- Check "Show only with service report" to display only tickets that have a linked Service Report (optional).
- Click Generate Report or Export.
⚠️ Attention: To ensure accurate recording of the time worked, it is essential that the Time Tracking feature is enabled on the platform.
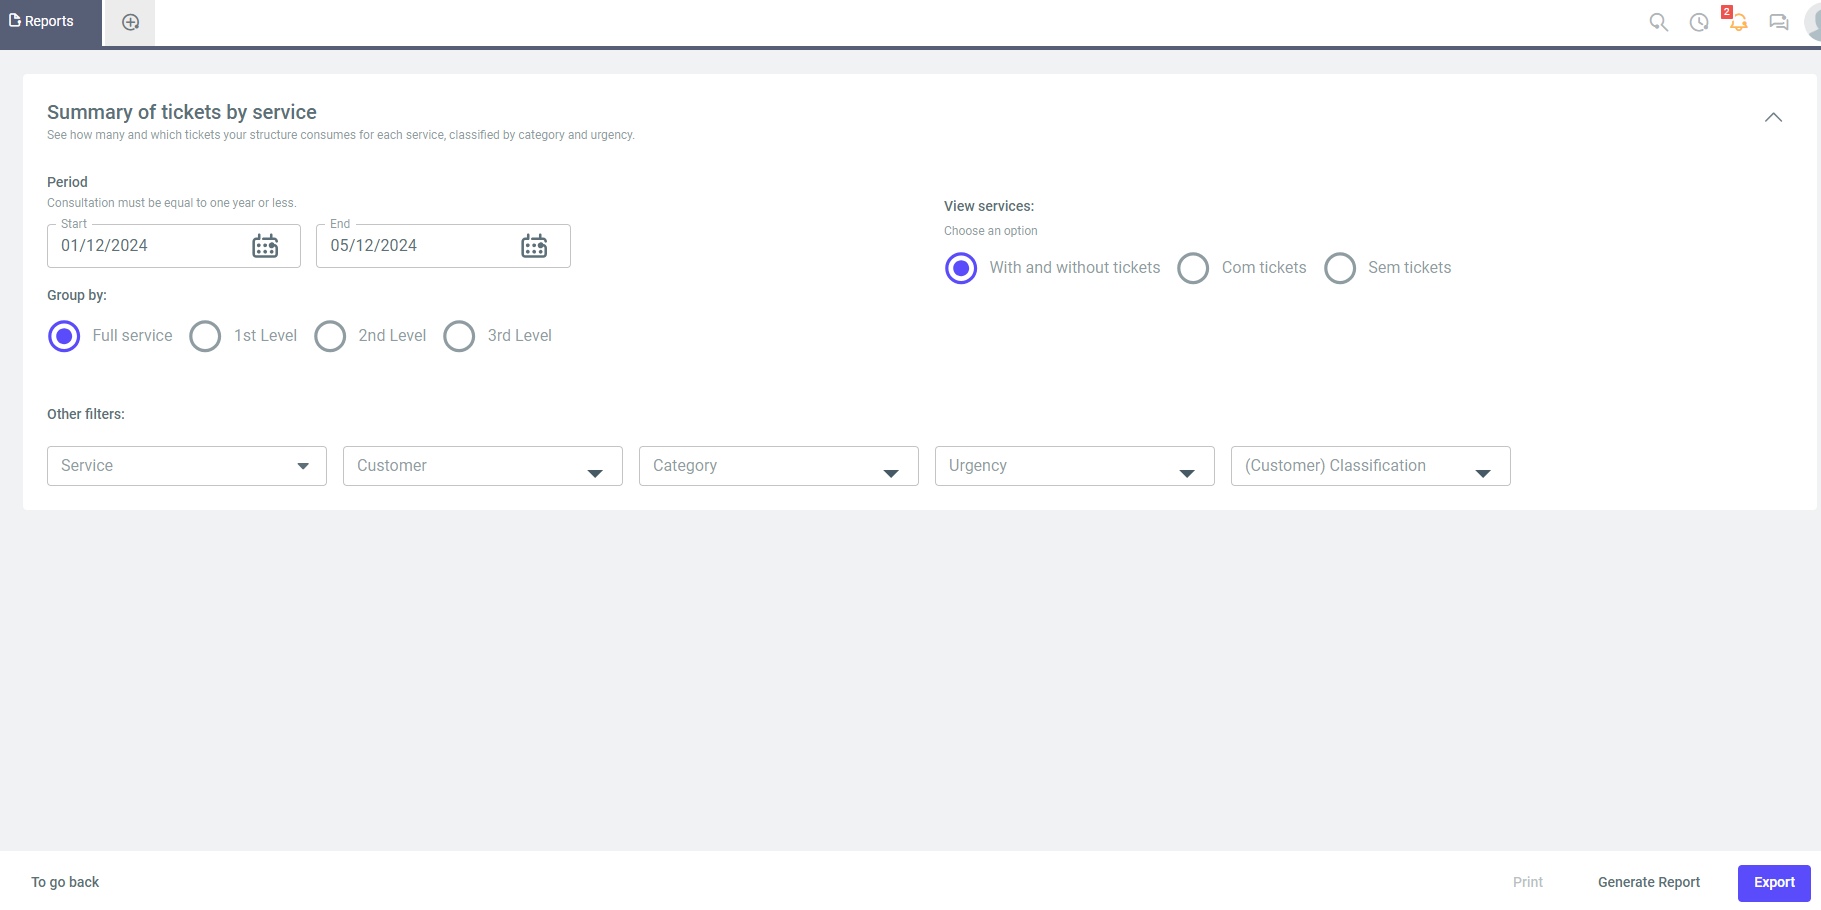
- In Reports, select Which tickets do I have by service?
- Configure the filters:
- Period: Select the analysis period.
- Grouping: Segment by service level.
- Display services: Select services with tickets, without tickets, or both.
- Other: You can choose by service, customer, category, urgency, and customer classifications.
- Click Generate Report or Export.
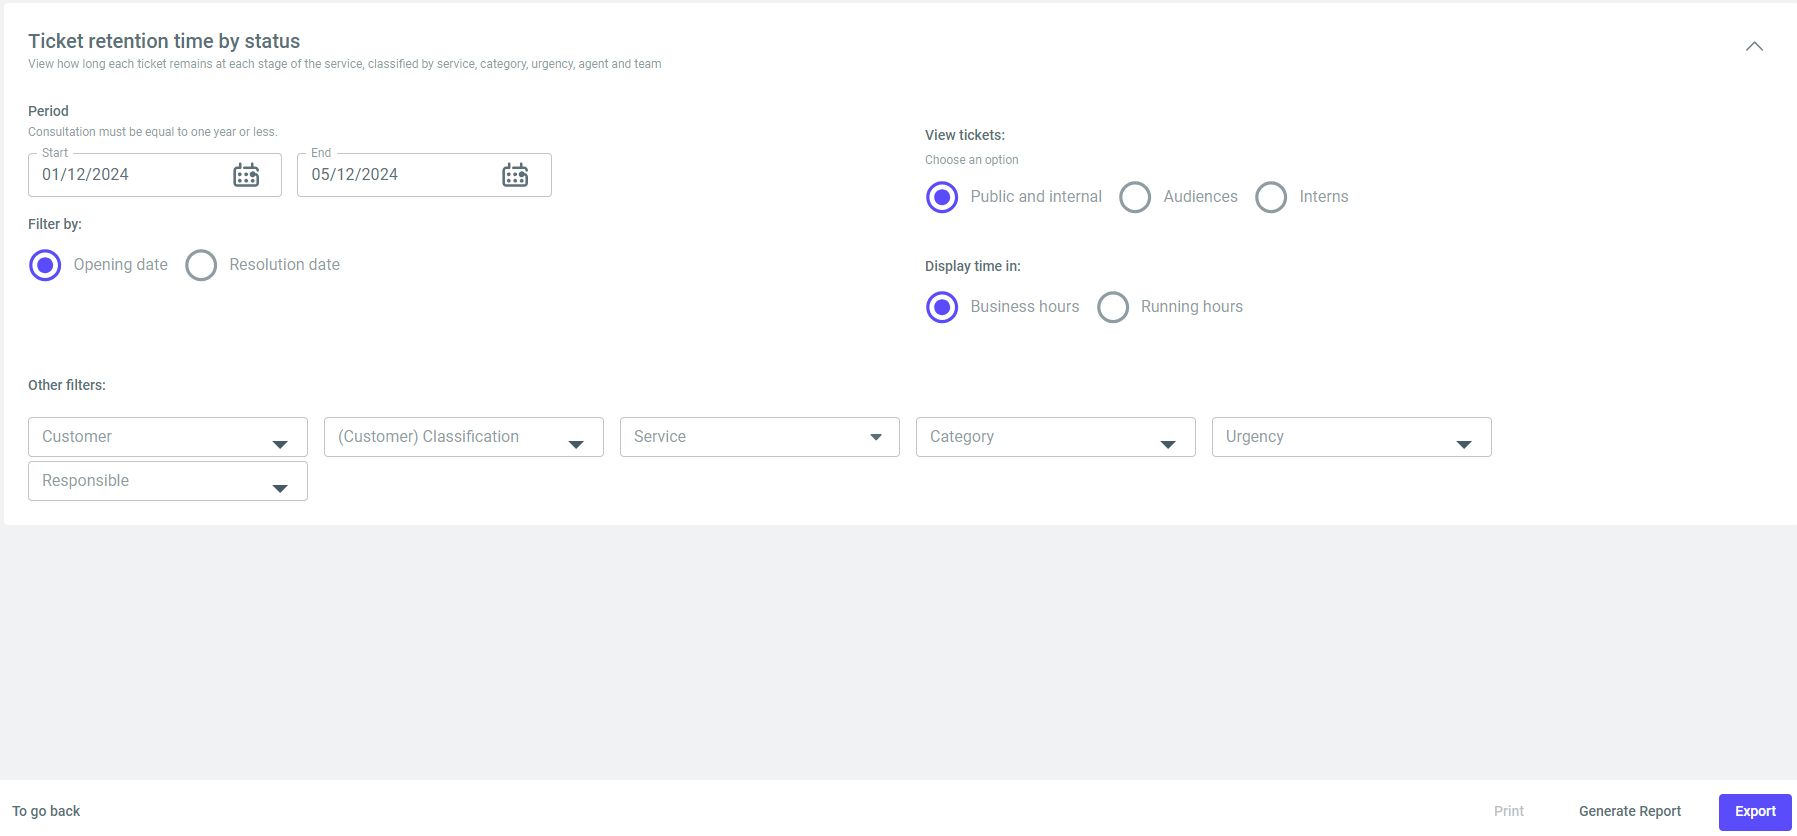
- In Reports, select What is the duration of tickets in each stage of service?
- Configure the filters:
- Period: Select the analysis period.
- Opening or closing of tickets: Filter by opening or closing date if you want to indicate in the report the total number of open or closed tickets.
- Ticket Types: Choose between public, internal, or both tickets.
- Time Display: Select whether you want to display the time in business hours or calendar hours.
- Other filters: You can choose by customer, customer classification, service, category, urgency, and responsible agent.
- Click Generate Report or Export.
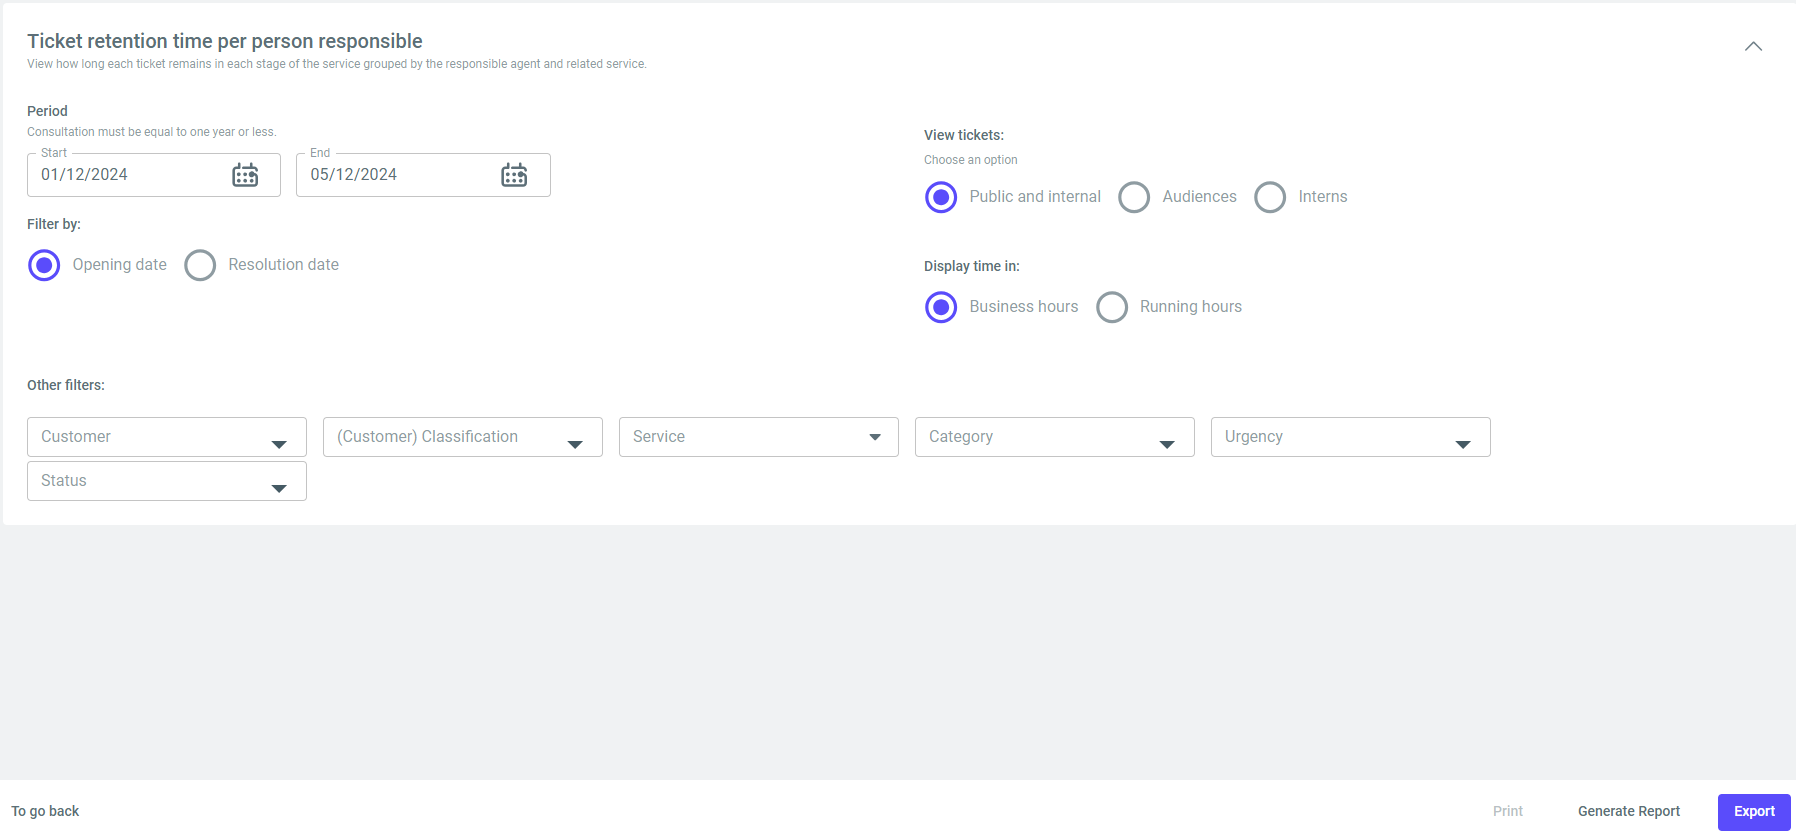
- In Reports, select What is the duration of tickets in each stage of service by responsible agent?
- Configure the filters:
- Period: Select the analysis period.
- Opening or closing of tickets: Filter by opening or closing date if you want to indicate in the report the total number of open or closed tickets.
- Ticket Types: Choose between public, internal, or both tickets.
- Time Display: Select whether you want to display the time in business hours or calendar hours.
- Other filters: You can choose by customer, customer classification, service, category, urgency, and status.
- Click on Generate Report or Export.
⚠️ Attention: The time a ticket is assigned to an agent will only be counted after there is a change in the agent or the status of the ticket.
Example: Ticket 1 has been assigned to agent Leonardo for 3 hours, but this information will not be reflected in the report until there is a change, such as the ticket being transferred to another agent or its status being updated.
Additionally, the report uses the business hours defined in the platform's parameters by default.
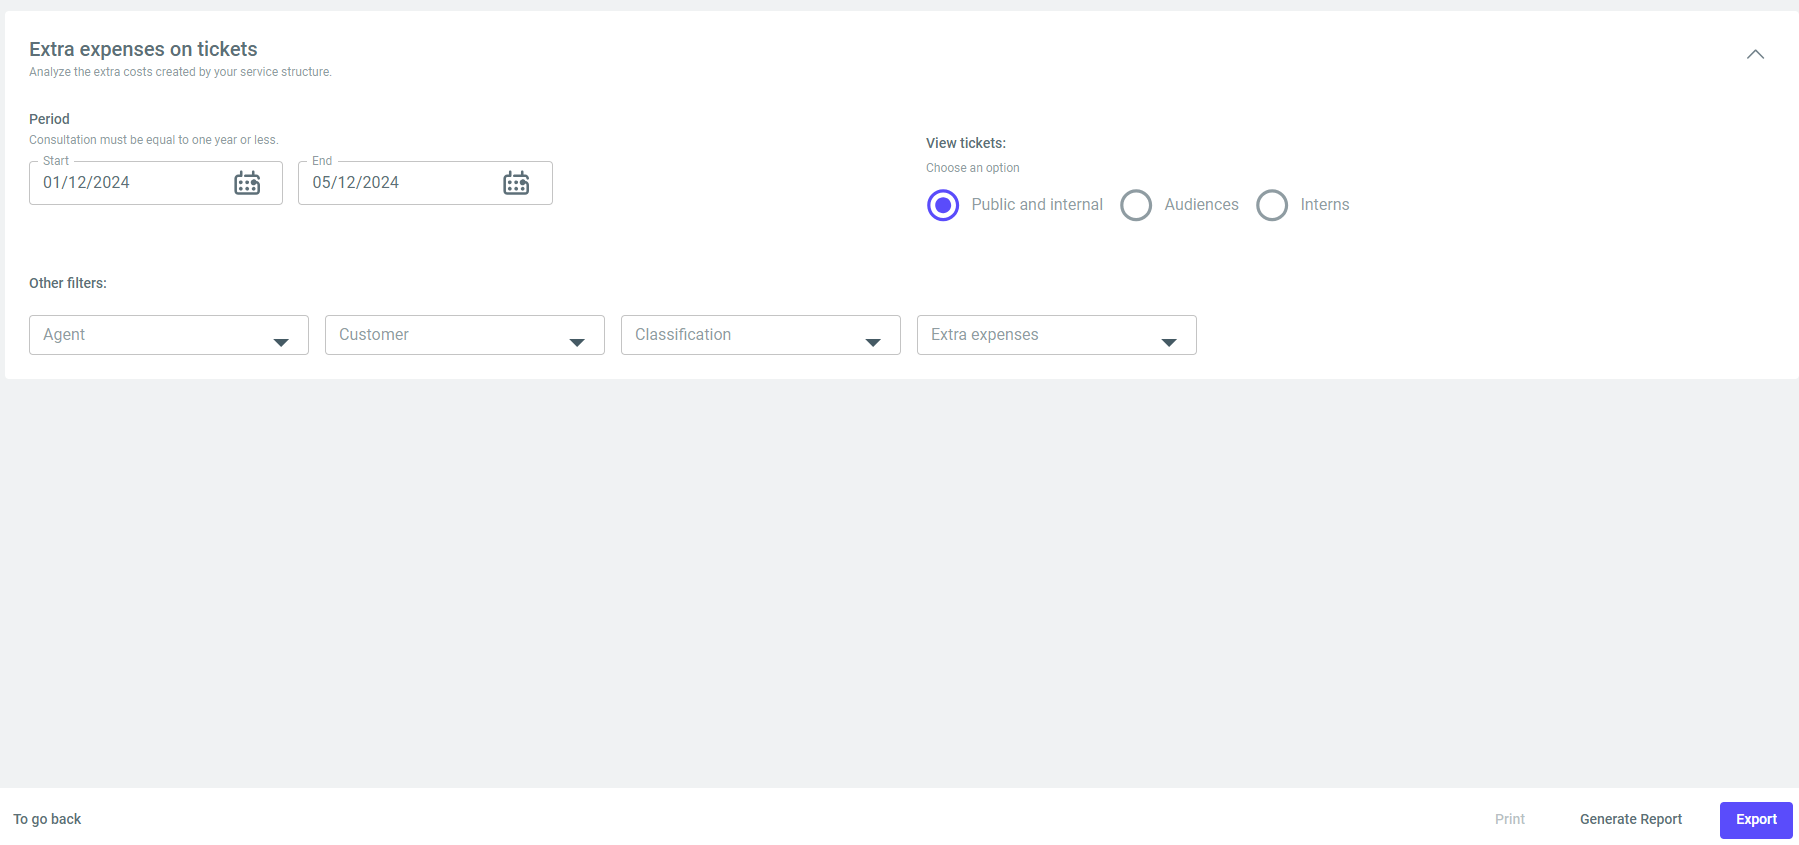
- In Reports, select What were the extra expenses in the tickets of my structure?
- Configure the filters:
- Period: Select the analysis period.
- Ticket Types: Choose between public, internal, or both tickets.
- Other filters: You can choose by agent, customer, classification, and extra expenses.
- Click on Generate Report or Export.
Customer Experience
- In Reports, select What were the results of my satisfaction surveys?
- Configure the filters:
- Period: Select the analysis period.
- Type of date: Select whether you want to filter by response date or ticket resolution date.
- Other filters: You can choose by responsible agent, customer, and response.
- Responses with or without comments: Choose whether to include all responses or only specific ones.
- Click on Generate Report or Export.
Contracts and Values
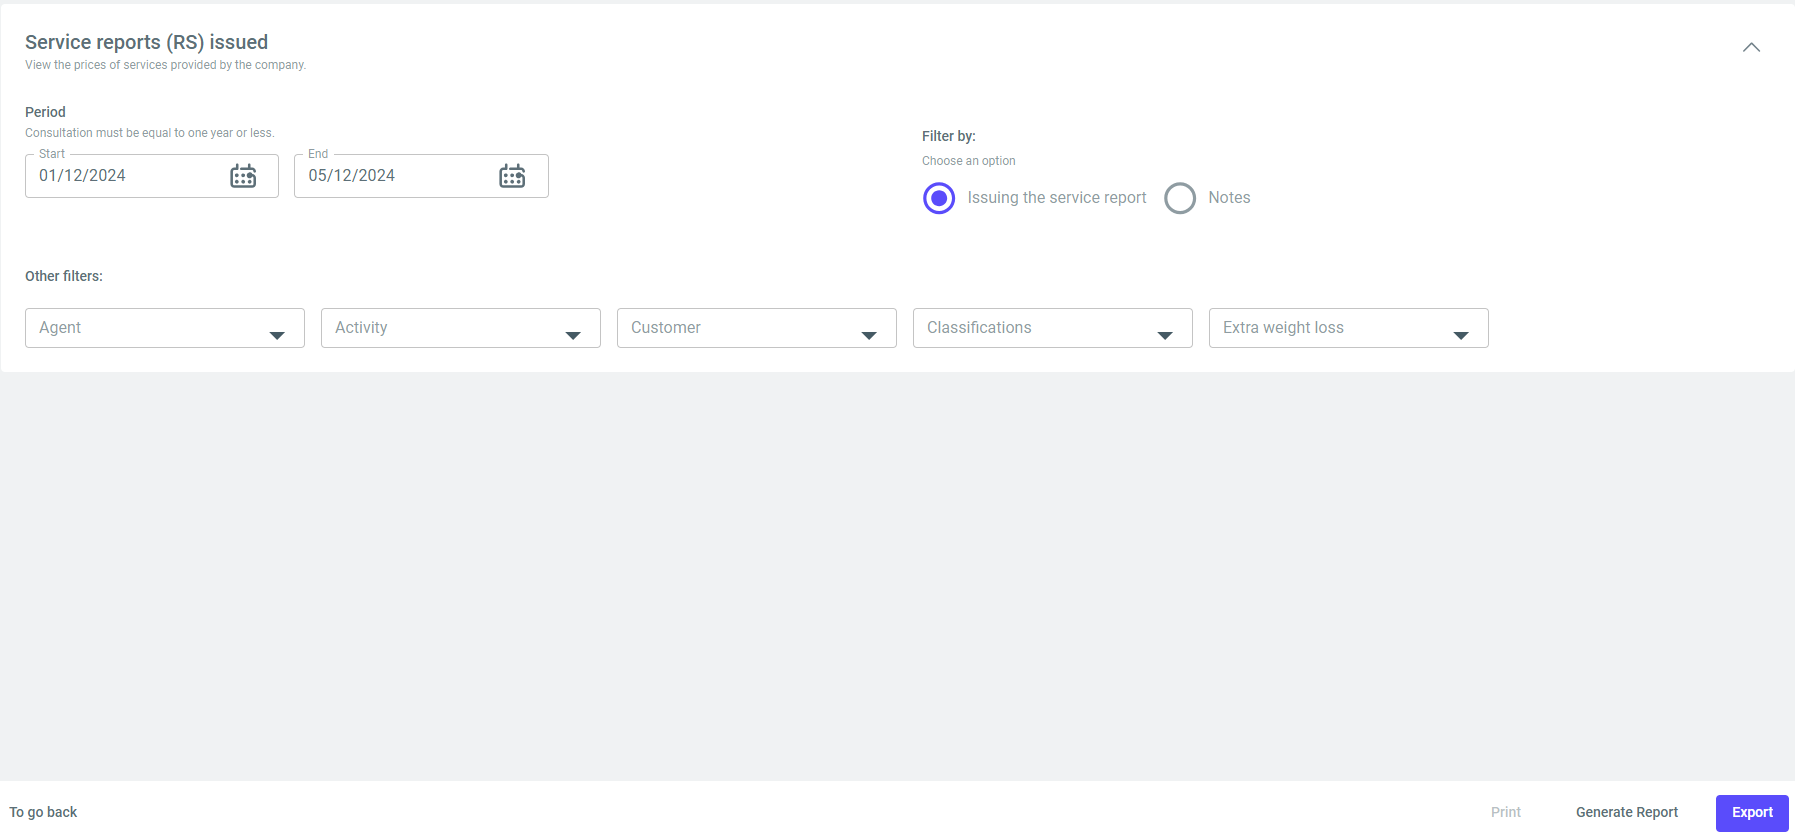
- In Reports, select What were the values (R$) of the services already provided?
- Configure the filters:
- Period: Select the analysis period.
- Type of parameter: Select whether you want to issue a service report or time entries.
- Other filters: You can choose by agent, activity, customer, classification, and extra expense.
- Click on Generate Report or Export.
Audit and Control
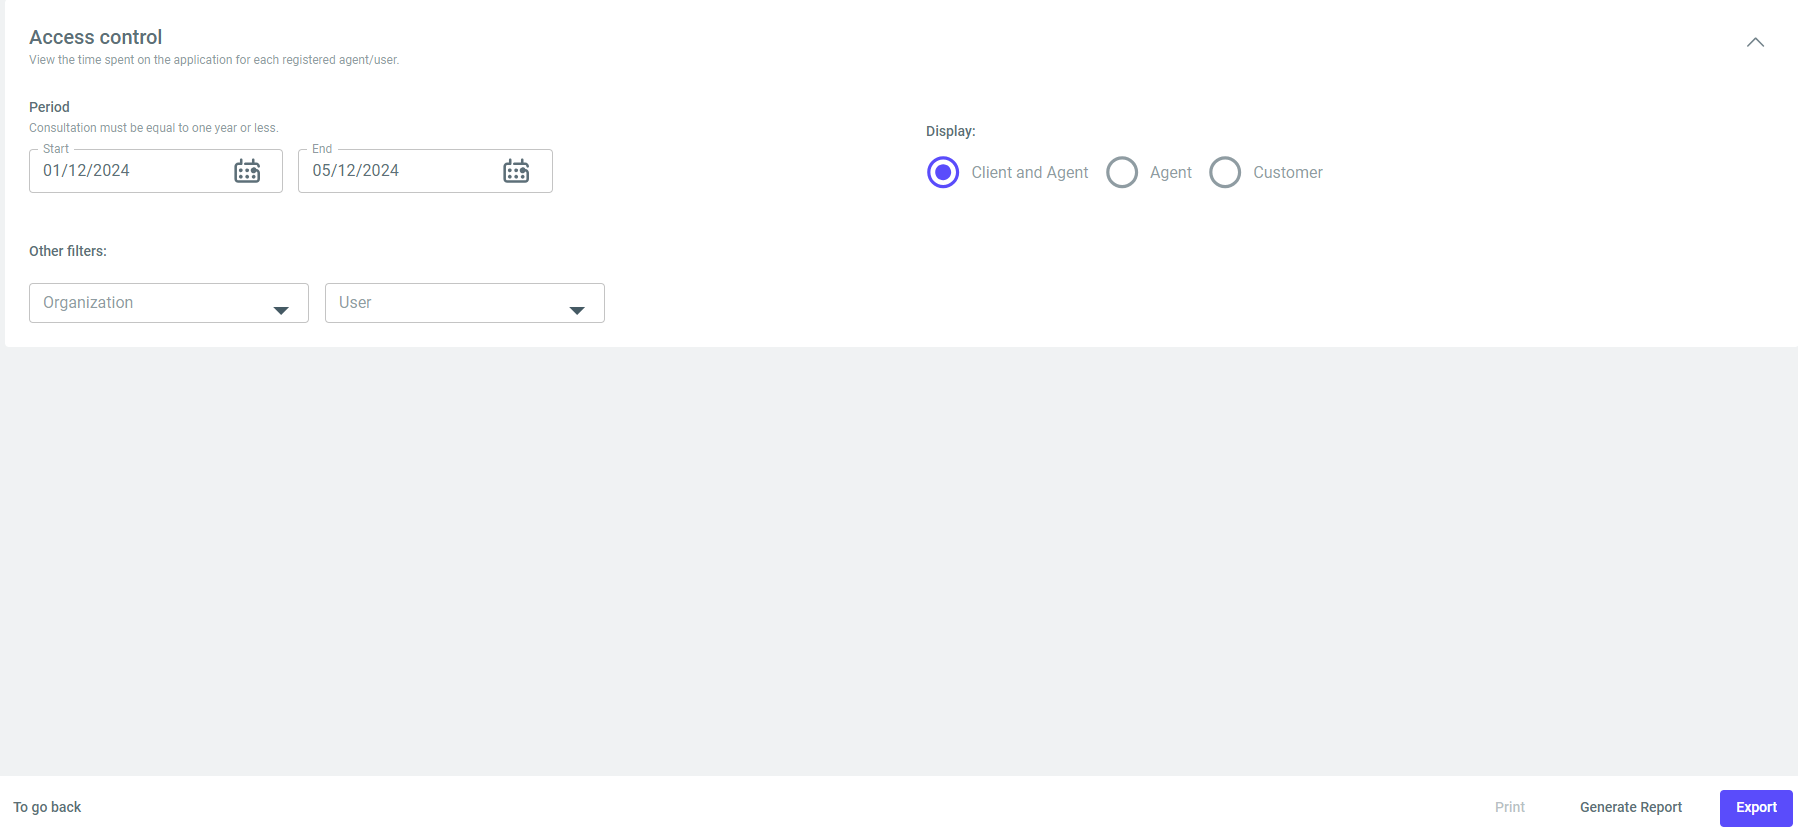
- In Reports, select How long has each user been on the service platform?
- Configure the filters:
- Period: Select the analysis period.
- Access type: Select whether you want to view the time spent by agent, customer, or both.
- Other filters: You can choose by organization and user.
- Click on Generate Report or Export.
Export Data
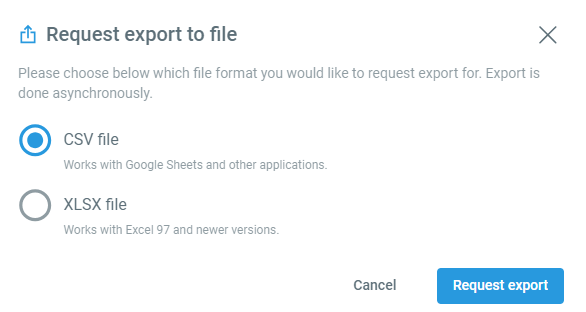
After applying the desired filters, you can export the data to spreadsheets in .csv (compatible with Google Sheets and other apps) or .xls (compatible with Excel 97 and later versions) through the Processing Center.
How to export a file:
- Click on Export.
- Select the desired file format (.csv or .xls).
- Click on Request Export.
- Go to the Processing Center to track the status.
Track Processing Status
In the Processing Center, reports go through different stages with the following statuses:
- Pending: The task is in the queue to be processed.
- Processing: The data is being generated.
- Completed: The file is ready for download.
You will receive both a visual and audible notification once the file is available. The exported data remains accessible on the platform for 30 days.
View Report on Screen (Alternative)
If you prefer, you can view the report directly on the screen:
- Click on Generate Report.
- Select Generate on Screen.
⚠️ Attention: Depending on the filters and periods applied, the time to generate the report may vary. For reports with large volumes of data, we recommend exporting to get the results more efficiently.

