Connect your chatbot built in Virtual Spirits with Zenvia Customer Cloud to automatically import conversations and leads into the commercial support area. This integration allows the chatbot history to be loaded along with each lead, ensuring continuity in service.
Requirements
- Active Virtual Spirits account with a published chatbot.
- Admin permission to configure integrations in both platforms.
Steps in Zenvia Customer Cloud
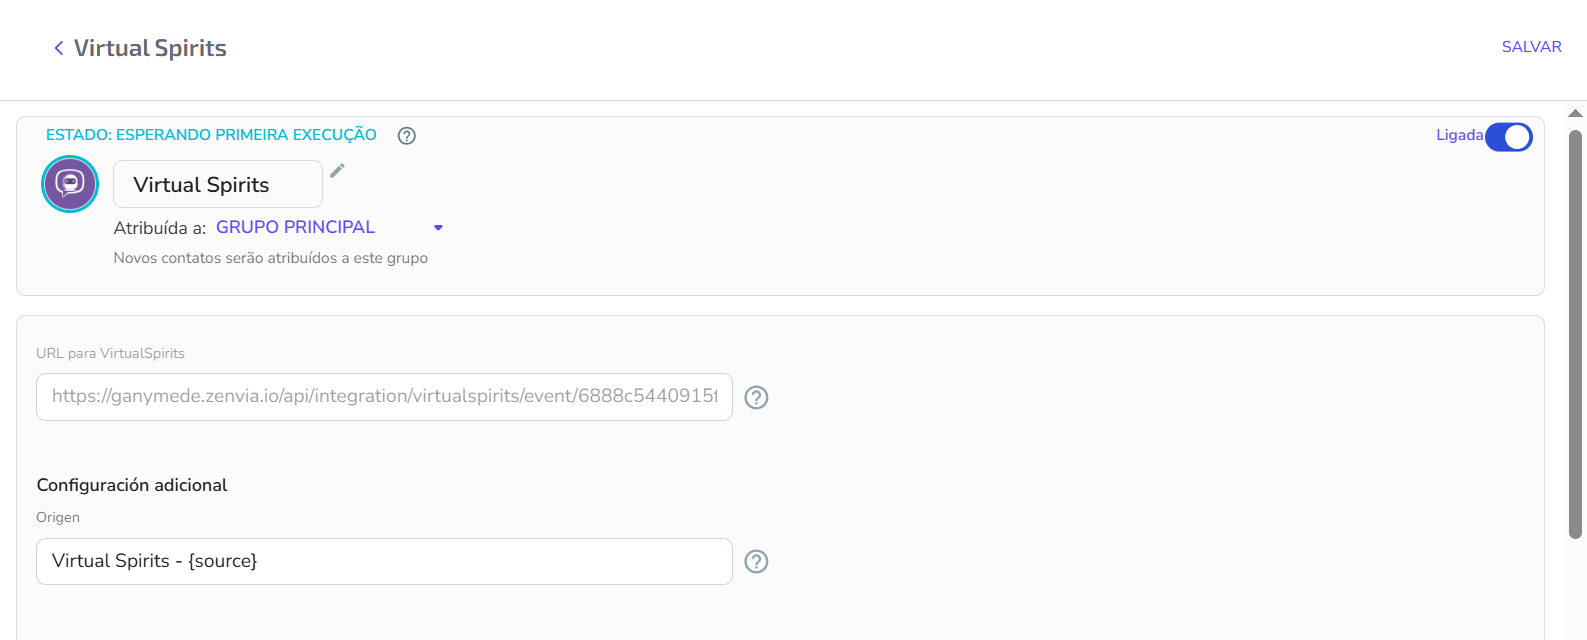
- Go to Sales > Integrations.
- Find and install the Virtual Spirits integration.
- After installing, assign the integration to a support group.
- Copy the generated integration URL. This will be used in Virtual Spirits to send leads.
- (Optional) In the Source field, define a custom value such as virtual_spirits. This field can be overwritten based on the data received from the chatbot.
The advanced settings in this integration offer greater control over lead handling:
- Overwrite source: Replaces the lead source name in Zenvia Customer Cloud. The original source will be lost. Can also be applied to existing leads.
- Priority: Sets the priority of leads. Leads with higher priority (1 being the highest) will be handled first by agents.
- Distribution rules: Allows you to create rules to distribute leads among groups or agents based on specific conditions. Example: “Assign to group X using rule Y.”
Steps in the Virtual Spirits panel
- Access the Virtual Spirits control panel.
- Choose the chatbot to integrate and go to Settings > Integrations.
- Find the Webhook / Send Leads section.
- Paste the URL provided by Zenvia into the destination field.
- Enable the following options:
- Send leads automatically
- Include conversation history
- Save the settings.
All leads interacting with the Virtual Spirits chatbot will be automatically sent to Zenvia Customer Cloud. In the support inbox, agents will be able to view the chatbot's full conversation history and continue the service in context.
💡 Tips:
|