In this article, you will learn what filling models are, how to use them, and how to manage them in Zenvia Customer Cloud.
What is a filling model
A filling model is a feature that automates tasks during the creation or attendance of a ticket.
Whenever there is a repetitive action, such as defining the service type, adding tags, or inserting standard messages, consider creating a filling model.
These models function as reusable templates that can be applied both in the creation and in the service of tickets, automatically filling in the necessary fields.
💡 Tip: Create a model called "Resolved Ticket Closure" to streamline ticket closing. This model can standardize the message sent to the customer, automatically set the status as resolved, include tags, and change the ticket type. This way, agents save time and ensure consistency in responses and ticket logging. |
Manage filling models
The Administrator and Operator profiles have the same permissions over filling models. Both can create, edit, clone, activate, deactivate, and delete models.
Models can be shared with all agents or only with specific agents. In this case, it will be necessary to indicate who can use them.
The maximum number of active models depends on the contracted plan:
| Plan | Limit of active models |
|---|---|
| Starter | Does not have |
| Specialist | Up to 5 |
| Expert | Up to 15 |
| Professional | Up to 60 |
| Enterprise | Unlimited |
How to access and manage models
Access:
Support service > Settings > Ticket Settings > Fill templates > Manage.
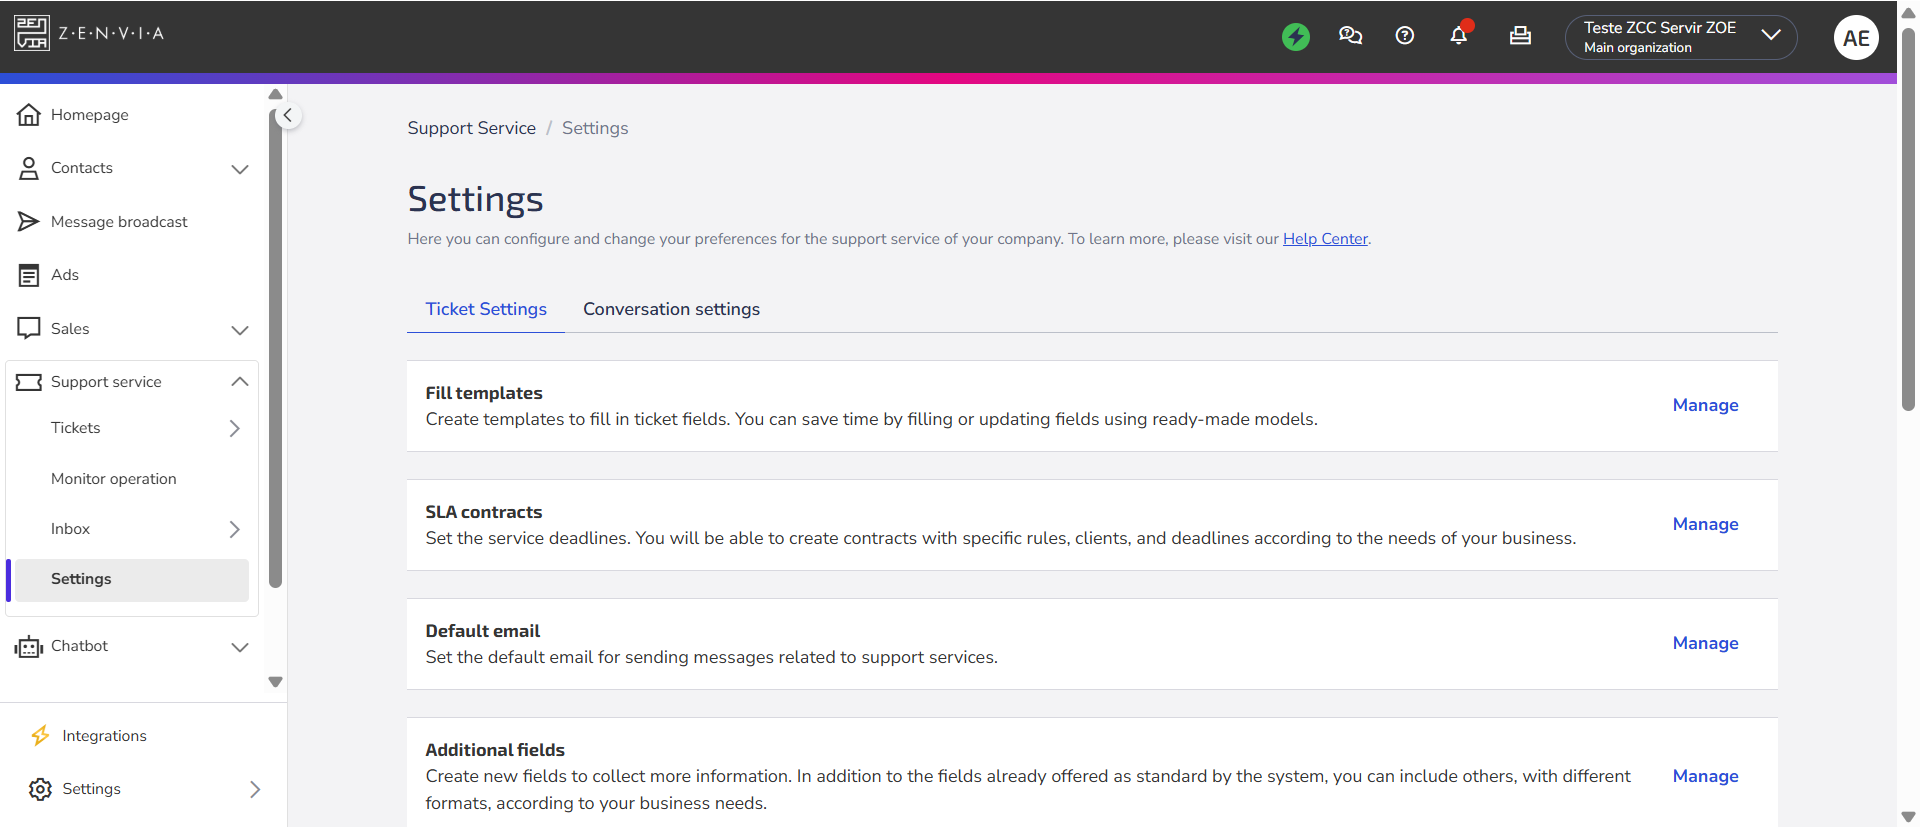
On this screen, it is possible to create, edit, clone, or delete existing models.
💡Tip: Only enabled models are executed in service tickets.

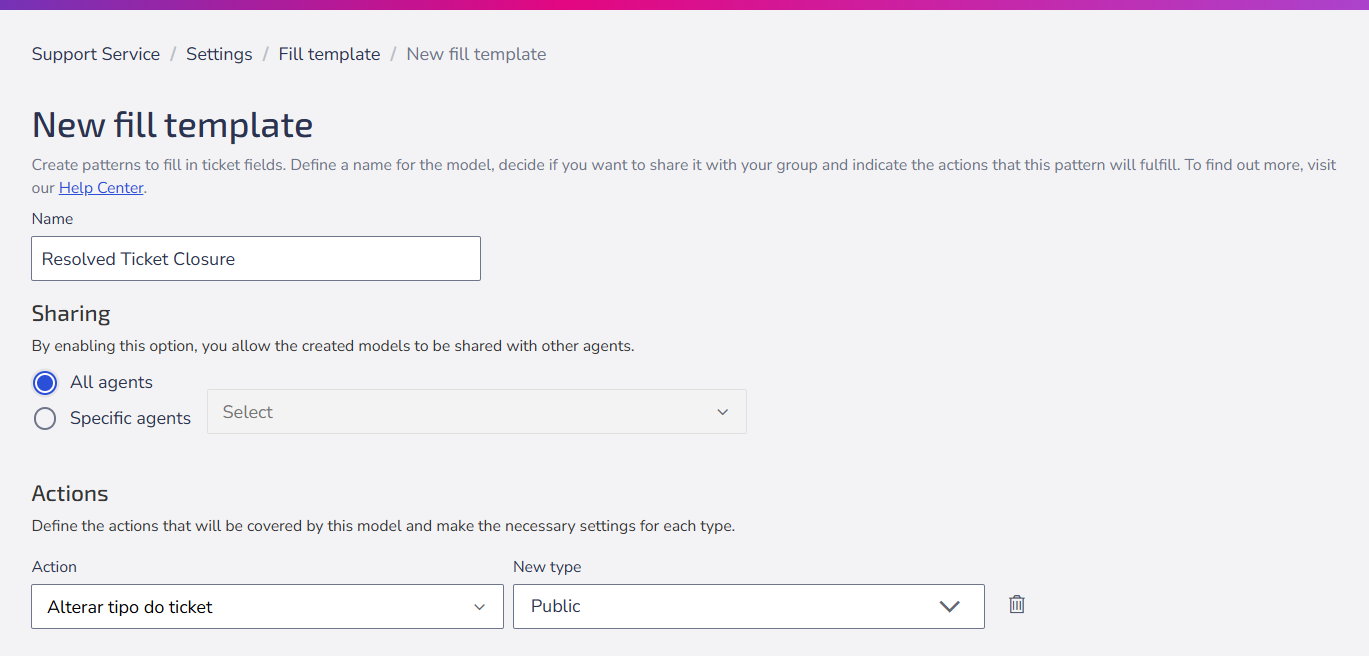
Create a filling model
To create a new model:
- Name the model. Choose a clear and objective name.
- Define the sharing type (all agents or specific).
- Configure the actions that the model will execute on the ticket.
To edit an existing model, just click on it in the list of models and follow the same steps used in creation. After saving, the updated model will be available for immediate use.
Available actions
Actions define what will be automatically changed in a ticket when a filling model is applied. The same model can execute one or several actions. Below are all the available actions and their respective descriptions:
| Action | Description |
|---|---|
| Change ticket type | Defines whether the ticket will be public (visible to the customer) or internal (visible only to agents). |
| Change ticket customer | Allows replacing the customer linked to the current ticket with another registration. |
| Change status | Updates the ticket status or its justification, according to the configured service flow. |
| Change service | Modifies the service assigned to the ticket, allowing reclassifying the type of request. |
| Change category | Changes the ticket category according to the options available in the organization. |
| Change priority | Defines the ticket priority (low, medium, high, urgent), assisting in the management of the service queue. |
| Change responsible | Assigns the ticket to a specific agent or redefines the current responsible. |
| Define subject | Changes the ticket subject. It can contain custom fields to insert dynamic information, such as the customer's name or the ticket number. |
| Include tags | Adds new tags to the ticket, without removing existing ones. |
| Define tags | Removes all current tags and adds only the new ones defined by the model. |
| Remove tags | Excludes all tags associated with the ticket. |
| Remove specific tags | Removes only the tags informed in the model, keeping the others. |
| Change action type | Defines whether the action to be added will be public (visible to the customer) or internal (visible only to agents). ⚠️ Attention: After applying a model with this configuration, it is necessary to confirm the saving of the action in the ticket. |
| Define action description | Automatically inserts text into the body of the action, which may include **custom fields** and text formatting. ⚠️ Attention: After applying the model, the agent must confirm the saving of the action in the ticket. |
| Define action attachments | Attaches files to the action automatically when the model is applied. ⚠️ Attention: After applying the model, it is necessary to confirm the saving of the action in the ticket. |
| Change additional field value | Modifies the value of an additional field whenever a pre-defined condition is met. Additional fields allow collecting detailed information in the ticket registration and can follow display rules that make the screen dynamic and contextualized. Learn more. |
Defining action description
One of the main functions of models is to standardize texts. You can create predefined messages, with custom fields, images, and videos.
⚠️ Attention: Videos inserted into the models must be hosted in public locations (e.g., YouTube). Private links may cause an error.
Custom fields
Custom fields are dynamic variables that represent ticket information, such as customer name, ID, status, or service.
They can be used in the actions:
- Define subject
- Define action description
To insert a custom field, click on Add custom field or type { to view the available options.
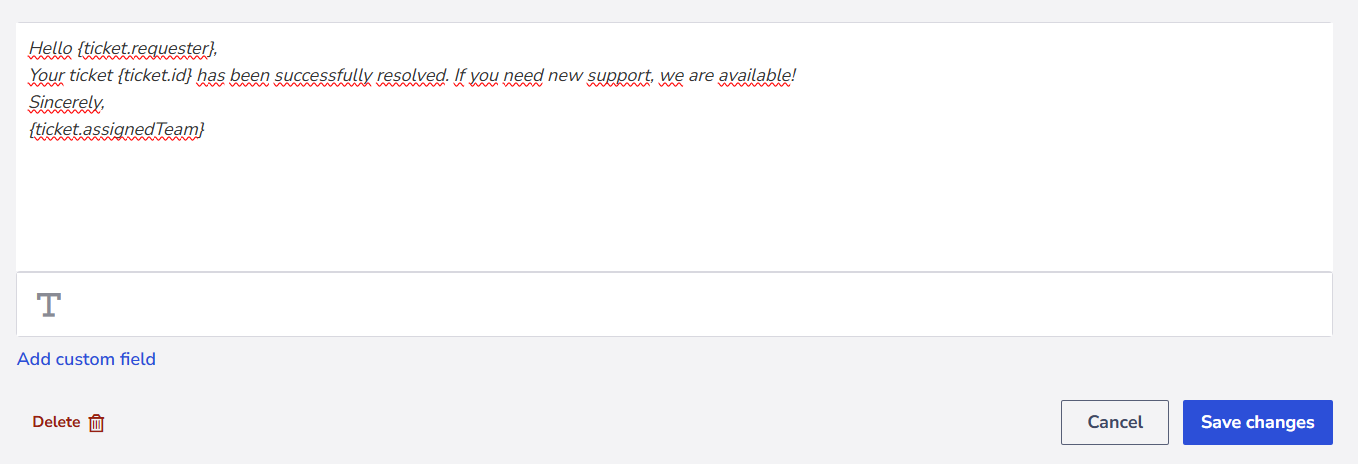
Example:
Hello {ticket.requester},
Your ticket {ticket.id} has been successfully resolved. If you need new support, we are available!
Sincerely,
{ticket.assignedAgent.team}
It will become:
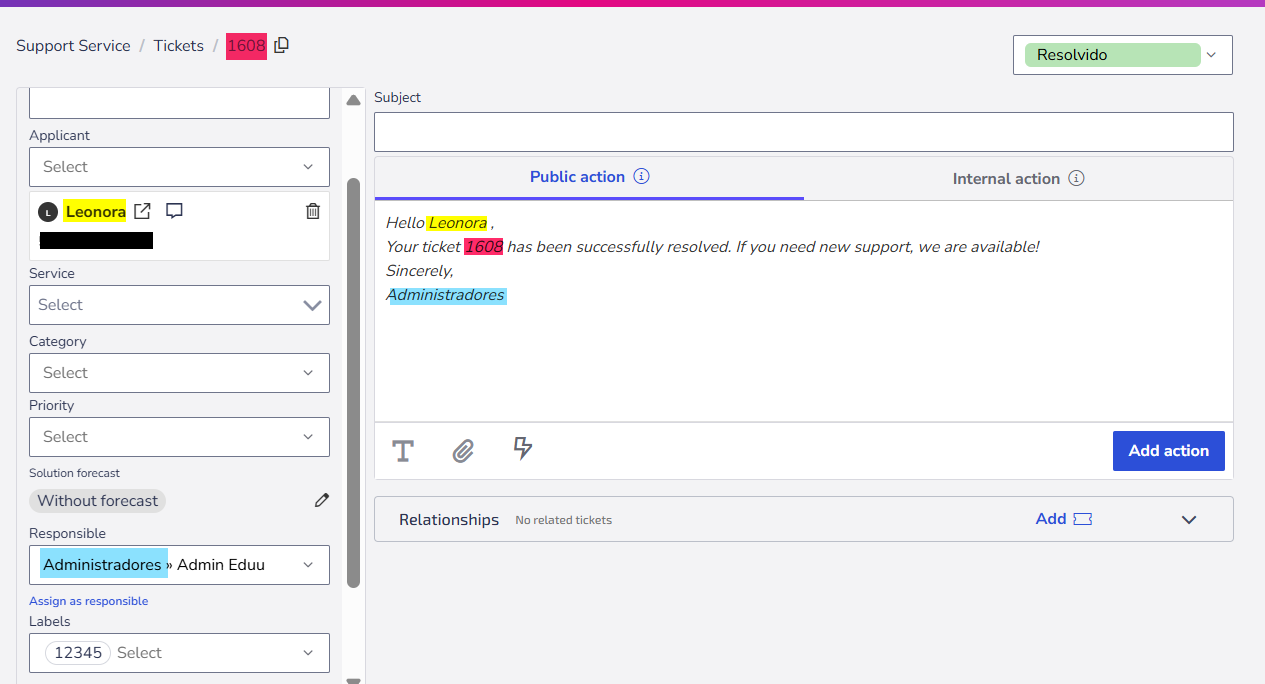
Using a model in tickets
After creating the models, you can apply them directly to a ticket:
- Open a ticket (new or existing).
- In the actions field, click the Filling Models icon.
- Select See all models and choose the desired one.
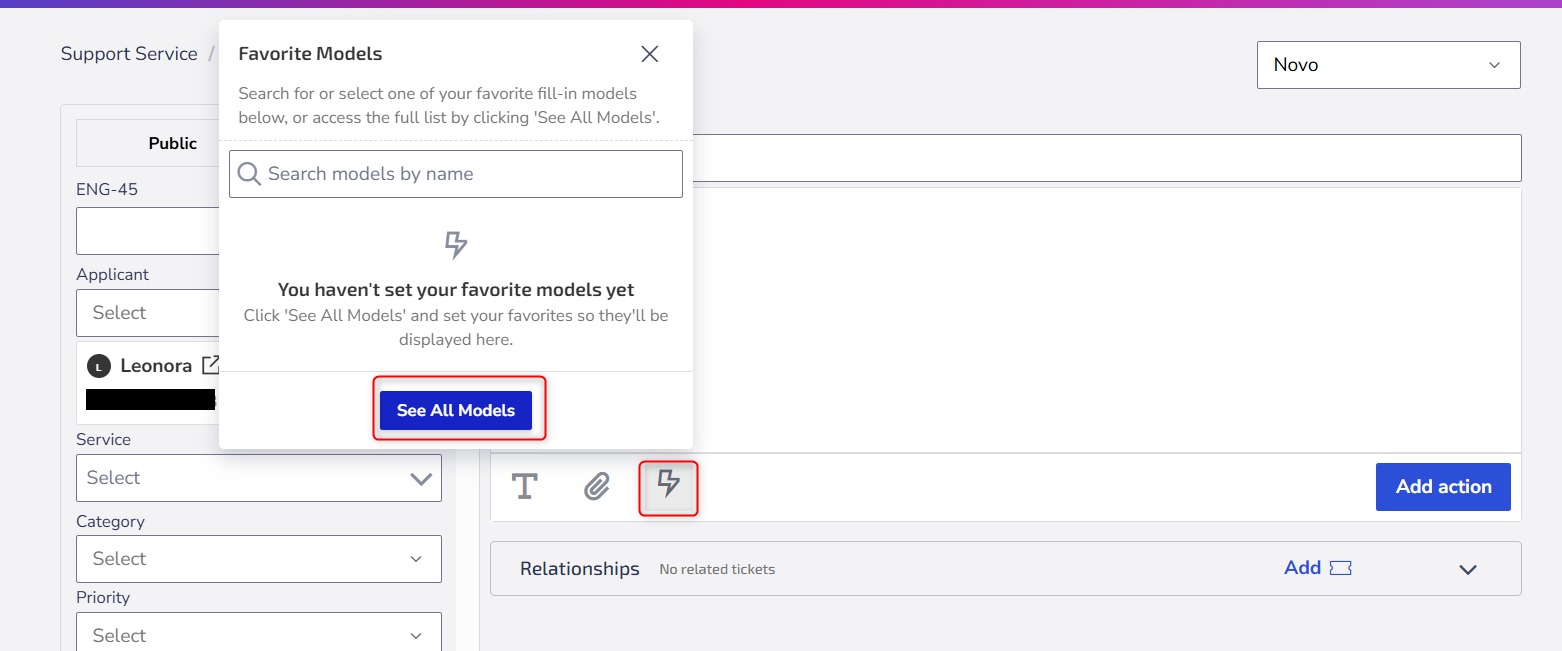
💡Tip: Mark models as favorites by clicking the ⭐ icon. They will appear first in the list.
When actions are saved on the ticket
New Ticket
The model's actions are only registered after the ticket is created.
Existing Ticket
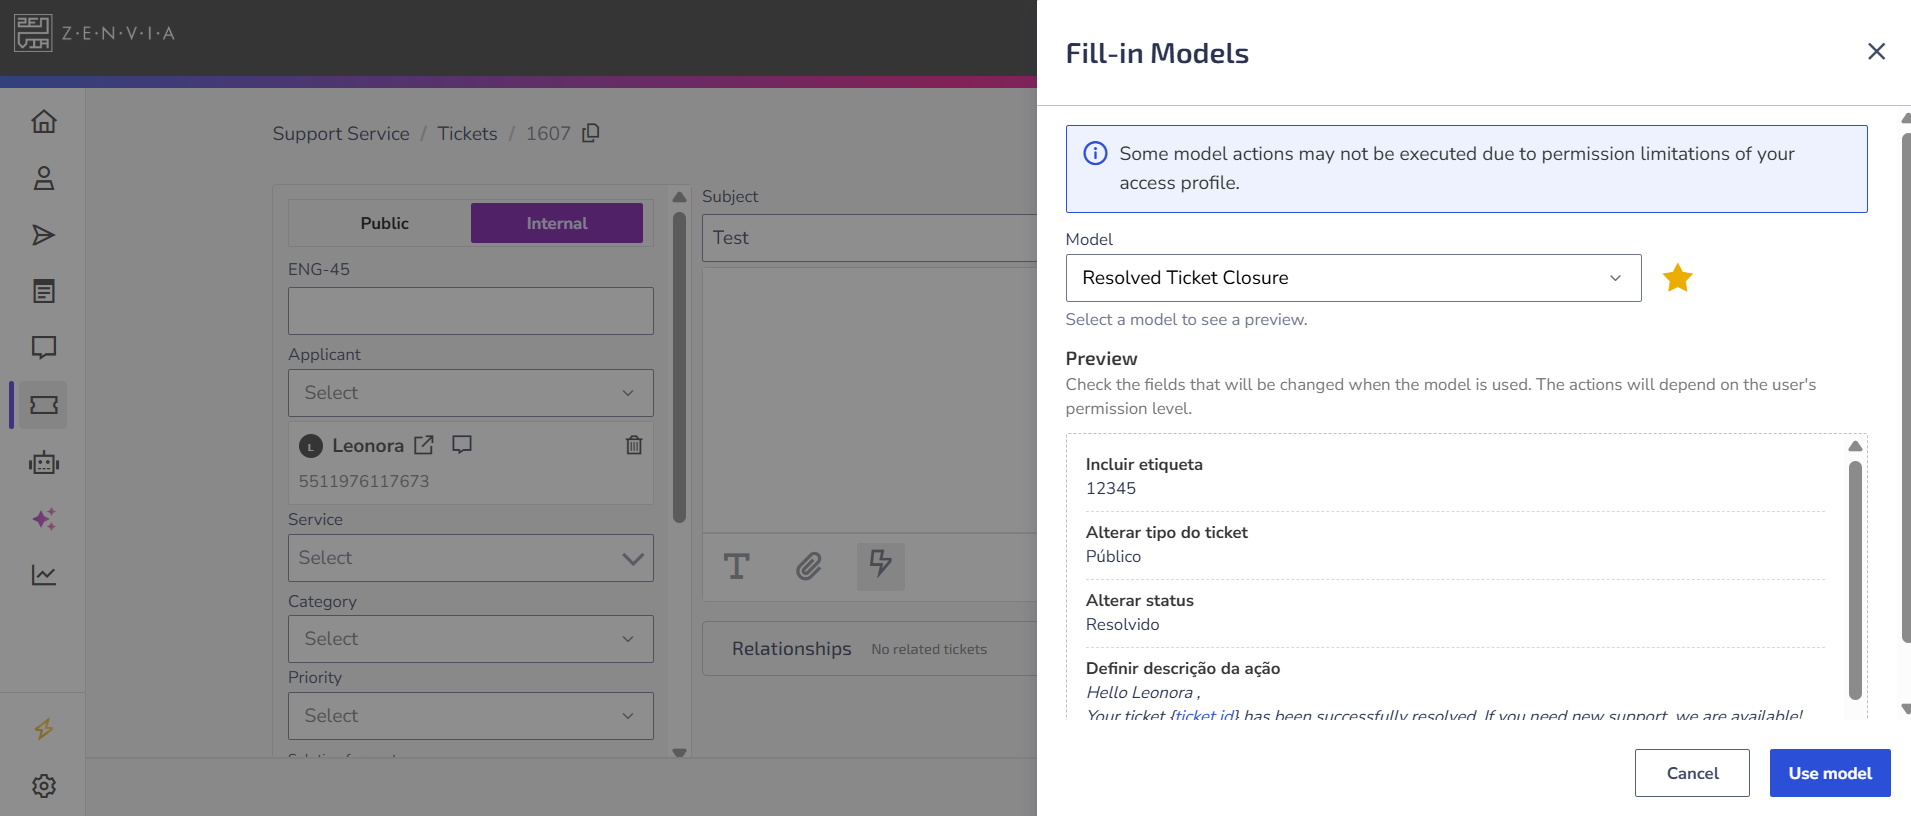
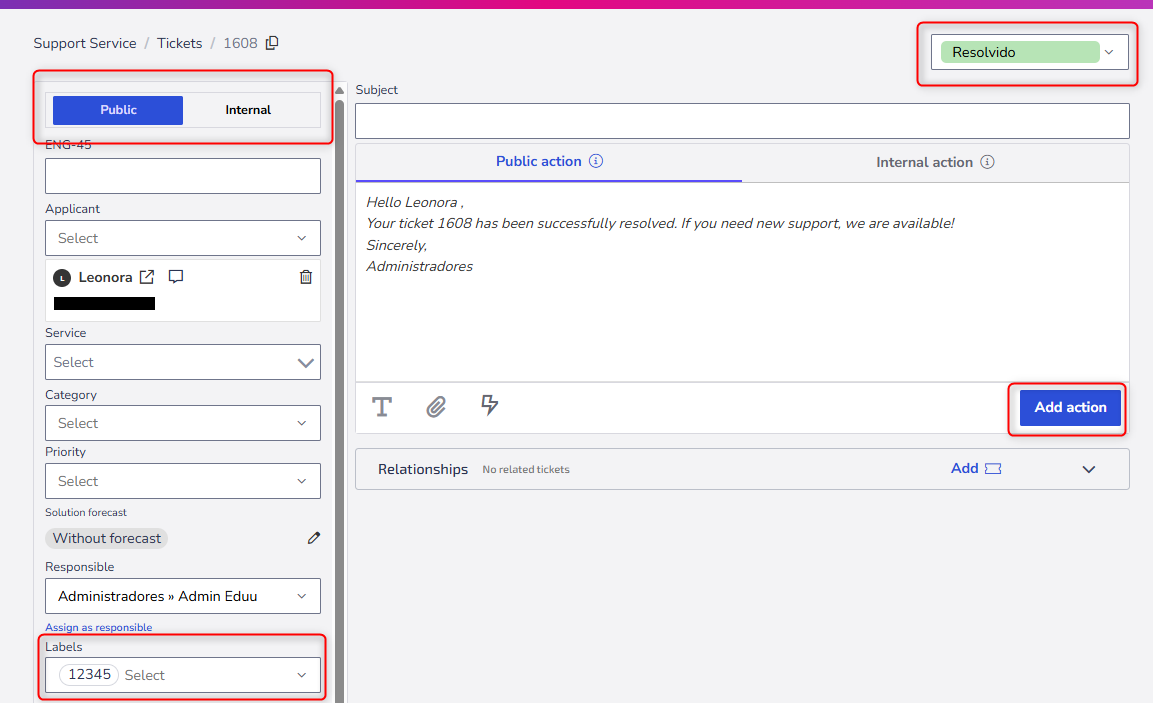
The actions are applied immediately, except for Define action attachments, Define action type and Define action description. These three require the agent to click Add action before saving.
In the example, a model called "Resolved Ticket Closure" was created, configuring actions to change the ticket type, status, add labels, and fill in the action description. Upon applying it, all these changes are automatically inserted into the ticket, and the agent must click Add action to conclude.
How to clone a model
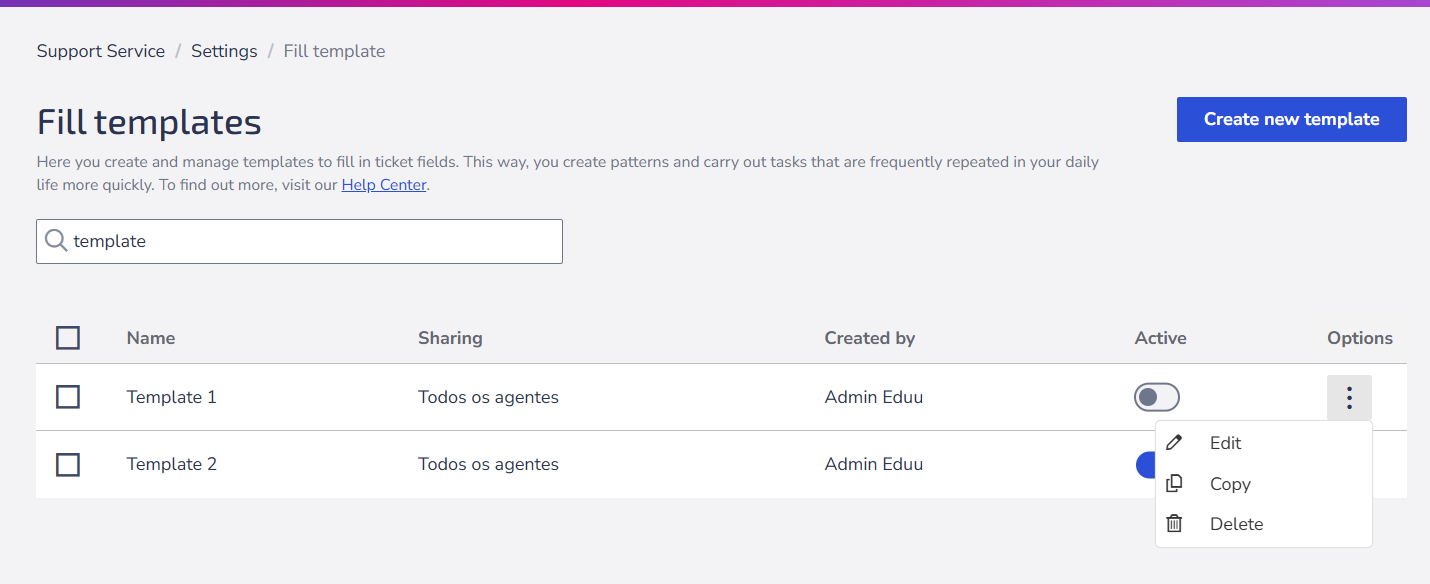
In the list of models:
- Click on the options menu of the desired model.
- Select Copy.
Use this function to quickly create variations of an existing model.
How to delete a model
In the list of models:
- Click on the options menu of the desired model.
- Select Delete.
Deletion is irreversible and permanently removes the model from the system.