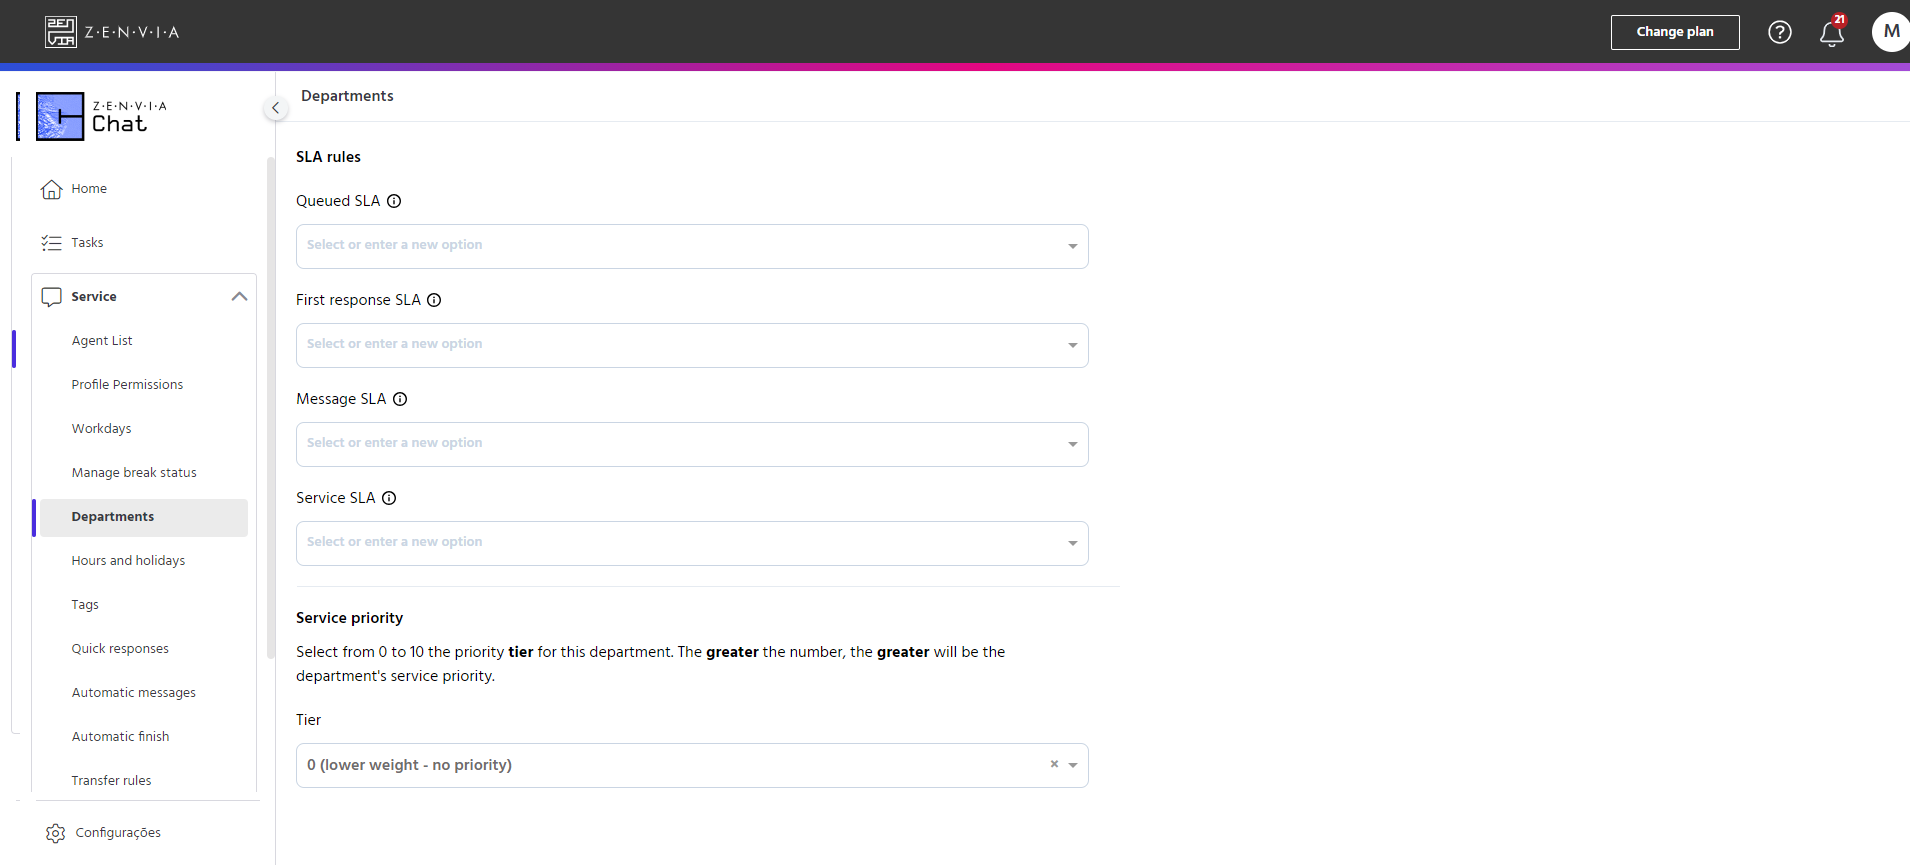
SLAs are intended to improve monitoring of the metrics analyzed by the Administrator and to help agents comply with SLAs (Service Level Agreements). The administrator can configure the time/period for each type of SLA: waiting, first response, message and service.
The waiting SLA is the time elapsed between creating the service and assigning it to the agent. The first response SLA defines and controls the maximum time for agents to start dealing with the customer. The time is counted from the moment the service is opened and ends when the agent sends the first message to the customer. The message SLA seeks to measure the agent's response time for each message received from a customer.
The requirement for configuring the message SLA is that you must have already configured the first reply SLA, otherwise the message SLA will not be released for editing. Once configured by the Administrator user, the message SLA time starts counting from the first message sent by the customer, after the agent's last message. By using the message SLA feature, it is possible to obtain benefits such as: greater control and visualization by Administrators regarding agent productivity, providing a more agile and effective service, consequently increasing customer satisfaction.
The service SLA is the time elapsed between assigning a service to an agent and the end of that service.
Remember that the first response SLA must be greater than the waiting SLA. The service SLA must be greater than the first response SLA.
⚠️ Attention: Users with an Administrator profile can configure the SLAs that make sense for their operation; SLA configuration is not mandatory.
Find out how to use the SLAs for each user profile:
-
Administrator profile.
-
Agent profile.
Administrator profile
To access the SLA for hold, first reply, message and service in Zenvia Chat, in the Side Menu go to Service > Departments > SLA rules.
When you add a new department or edit an existing one, the SLA fields are available to fill in.
The SLA fields can be filled in with the value in seconds and there are some predefined values, you can enter the value in seconds according to what you want for each of them.
💡Tip: Calls that exceed the specified time will be marked with a highlighted color (yellow) on the Monitoring screen.
We've also added a filter (clock) to the Monitoring screen, so that the user can easily filter out all the agents who have appointments that exceed the set time.
That's it! Now you know how to use each SLA in the Administrator profile.
Agent profile
On the agent's screen, all calls that exceed the configured SLA time will notify the agent of what has happened, and the calls will be highlighted (yellow), as shown in the example below.
On the agent's screen, the SLAs (on time) will be displayed as follows.
Remember that you can choose to include the message SLA in additional columns in the Reports, both in the Custom Reports and in the Service History Report.
That's it! Now you know how each SLA will be displayed in the agent profile.

