Mass messaging through WhatsApp is an effective strategy to establish direct communication and reach a large number of recipients quickly and personalized. The channel features capabilities that allow the sending of messages with images, videos, emojis, response buttons, and links leading directly to a product or service offered by your company.
⚠️ Attention: This feature is available only for users with the Operator or Admin profiles.
To send a WhatsApp message, it is necessary to integrate and configure the channel. Additionally, ensure you have message templates pre-approved by Meta. If you do not have approved templates in your account, create and submit message templates for WhatsApp approval directly in Zenvia Customer Cloud.
After these configurations, go to Message broadcast > Broadcast and automation and select the WhatsApp channel.
The construction of the WhatsApp broadcast consists of three steps, which we will detail below.
Create the message
- Define the broadcast name;
- Select one or more tags to identify your broadcast. You can add or create new tags;
- In Broadcast number, choose the phone, from the approved numbers in your account, for broadcasts;
- Next, choose one from the pre-approved templates.
WhatsApp templates
By WhatsApp's definition, templates awaiting approval or already approved can be edited. Validation is instantaneous, and the template may be approved or not.
Rejected templates can be edited to attempt a new approval. However, Disabled templates cannot be edited. Disapproved templates can be edited so that you can try again. However, Disabled templates cannot be edited. A WhatsApp template can become disabled for various reasons, usually related to Meta's policies and guidelines, check out more information about this here.
To edit a template, in the Zenvia Customer Cloud horizontal menu, go to Settings > Message Templates > WhatsApp. Find the template to be changed, and in the three-dot menu, select Edit template.
If the template content is not in line with your needs or has spelling errors, you can delete it and create a new template.
Configure Opt-out
Some customers may choose not to receive marketing campaigns from your company via WhatsApp. To provide this choice, it is recommended to add an Unsubscribe button in your message template. The text of this action can be customized according to your needs.
When the user clicks on this button, it indicates that they want to be removed from the contact list, and as a result, their status will be marked as Unsubscribed in the campaign reports.
The option to stop receiving messages on WhatsApp is known as Opt-out. Learn more about the benefits and how to configure opt-out.
Continue interaction with the contact
In addition to sending messages, in Zenvia Customer Cloud, it is possible to continue the conversation with your customers and increase sales.
For example, you can send a promotional offer to a specific number of customers and continue the conversation with them, answering questions, or even sending a payment link to finalize the sale.
To continue the interaction:
- Select Continue interaction with humanized customer service. Contacts who respond to your broadcast will be in Sales > Customer inbox.
- Select Continue interaction with automated customer service. Contacts who respond to your broadcast and are assisted by chatbots will be in Chatbot > Chatbot inbox.
Set an auto-reply
If the customer replies to the message, configuring an automatic response allows you to provide additional information, clarify doubts, or thank them for the interaction.
Simply activate the Yes, set an auto-reply option to schedule a standard message.
💡 Tip: Normally, the automatic response is also used to communicate to the customer that this channel is not for customer service, provide operating hours, and next steps.
Upon completion, click Continue.
Once the message content is defined, it is necessary to choose the recipients.
Configure broadcast
In this step, define the recipients of the messages. You can send them to contacts from your database, imported from a .csv file, or added manually.
⚠️ Attention: If the content of your message includes a media file, the sending of the content occurs at this stage through the contact base or by importing a file. Check the Accepted Media Types table to know which media files and formats can be used at the time of sending the broadcast.
Next, we will detail each of these options.
Select from the contact base
To send to contacts from your base, it is necessary to select the list of contacts, specific contacts, or segmentation rules already added to the platform to receive this broadcast. After doing this:
- Click on Pick from contact database;
- Select the list of contacts, specific contacts, or segmentation rules, and click Add;
- Upon completion, click Continue.
Done, your users have been added!
Next, we will detail sending contacts imported from a .csv file.
Upload .csv file
To send to contacts imported from a .csv file, you need to upload a file in .csv format. All broadcasts that have variables must be done via .csv file.
The file must follow these standards:
- Be in .csv format and UTF-8 encoding;
- Contain phone numbers mandatory in the first column, i.e., always in column A of the spreadsheet;
- The first line of the file must be the header. Enter the names of the variables used in your message and use a comma (,) or semicolon (;) to separate each field. In the example, the file contains, in addition to the Phone, the Name, Date, and Time fields, as the message text has the variables {{name}}, {{date}}, and {{time}};
- Separate one contact number per line of the file;
- Contain the contact number in the DDI+DDD format (e.g., 5551999999999);
- Contain up to 120 MB;
- Only for messages with media files: Include a column with the URL of the media file. Media contents only work through direct and public links and must comply with the accepted formats and sizes, as indicated in the Accepted Media Types table.
In the example, we will send an SMS message with the variables {{name}}, {{date}}, and {{time}}.
Example to configure the file:
For the message 'Hello {{name}}! Your appointment is scheduled for {{date}} at {{time}}. To cancel the appointment, call 0800 400 1100,' it is necessary that the file contains the message variables organized in separate columns.
With the file configured correctly:
- Click on Upload .csv file;
- Drag and drop the file or click Select .csv file;
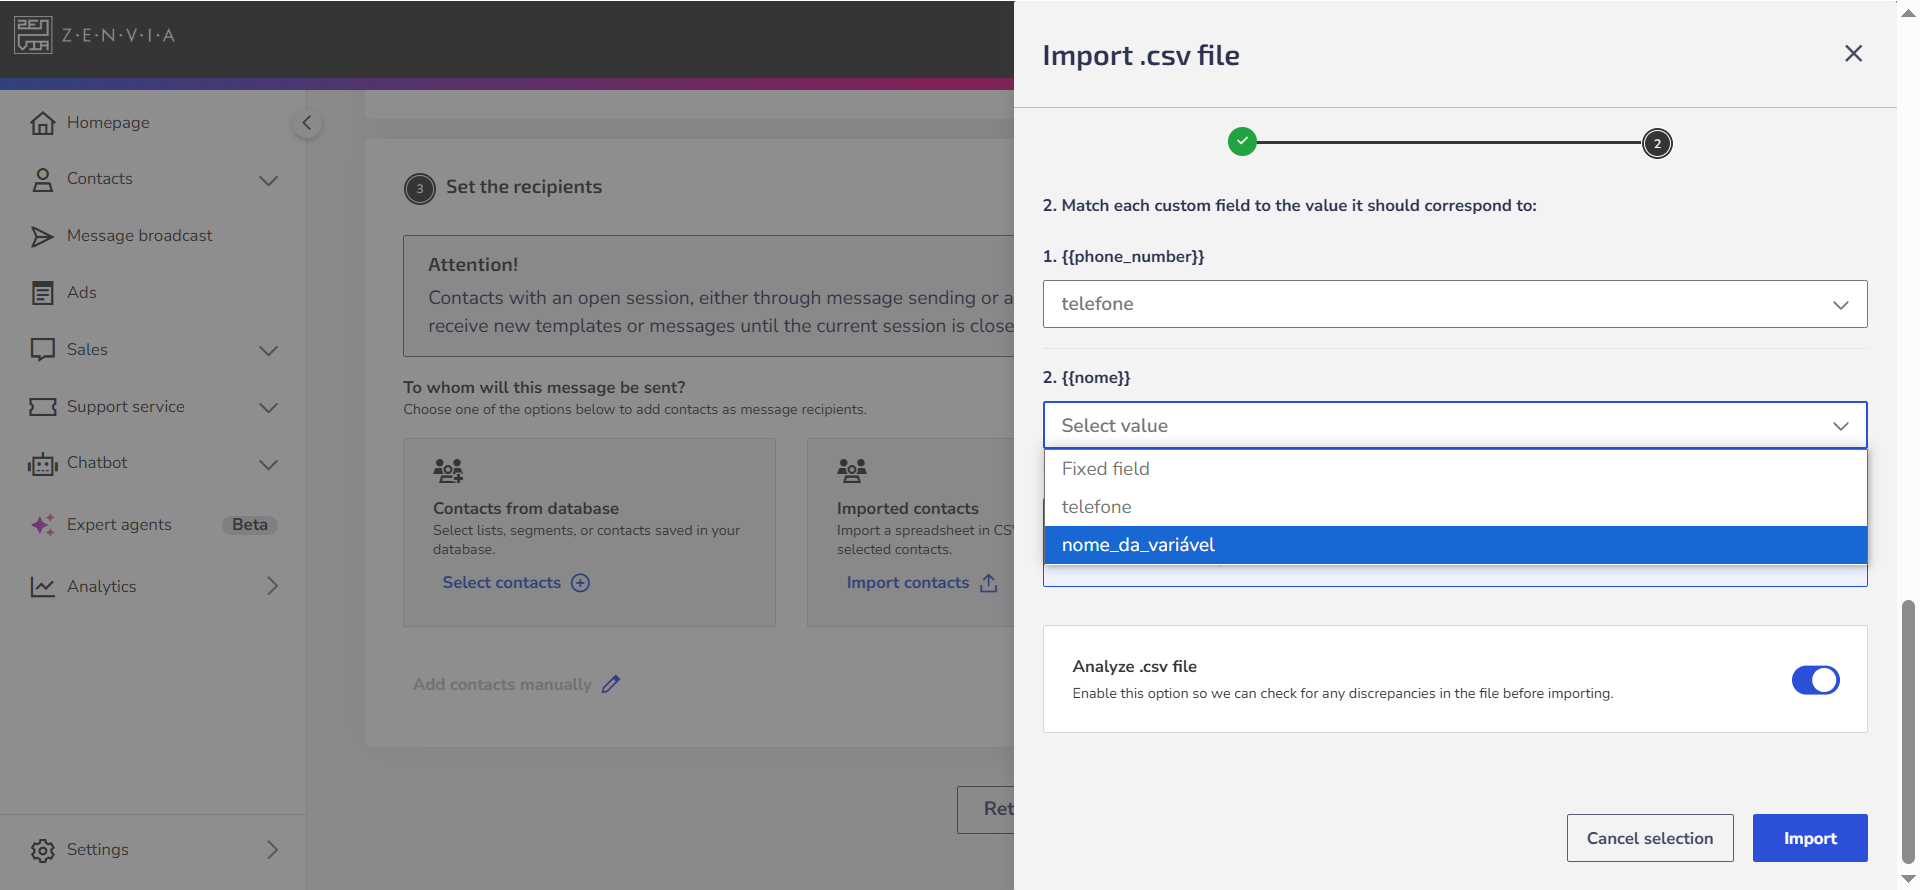
- The next step is to associate the variable fields with the corresponding value, i.e., what each field in the table represents;
- If you want to review your file and check if it is ready for use, enable the Analyze .csv file option.
- Upon completion, click Continue.
Now, let's explain how to send to contacts added manually.
Add contacts manually
To send to contacts added manually, it is necessary to add recipient numbers using a semicolon (;) to separate the phone numbers. To do this:
- Click on Add contacts;
- Enter the phone numbers in the DDI+DDD+9 digits format, without using spaces or dashes;
- Click Add to complete the action;
- Upon completion, click Continue.
Done! With the message content and recipients defined, let's move on to the final process of sending the message.
Send the message
After completing the recipients' step, check the broadcast summary. Next, you need to choose when you want to send the SMS message. To do this, click Dispatch or schedule.
Select one of the broadcast methods to complete the sending process:
- Broadcast now;
- Schedule broadcast;
- Send at the best time.
💡 Tip: If you do not want to send messages to all recipients at once, you can split the message sending into batches.
Done! Now you know how to create and configure a WhatsApp broadcast in Zenvia Customer Cloud.