The Ticket Classification organizes and prioritizes the tickets, optimizing the workflow and efficiency of the support. This feature allows the team to quickly identify the type of request, urgency, and responsible department.
⚠️Attention: Feature available only for Operator and Admin profiles.
How it works
The configuration of the Classification is one of the initial steps for using the Support Attendance module in Zenvia Customer Cloud.
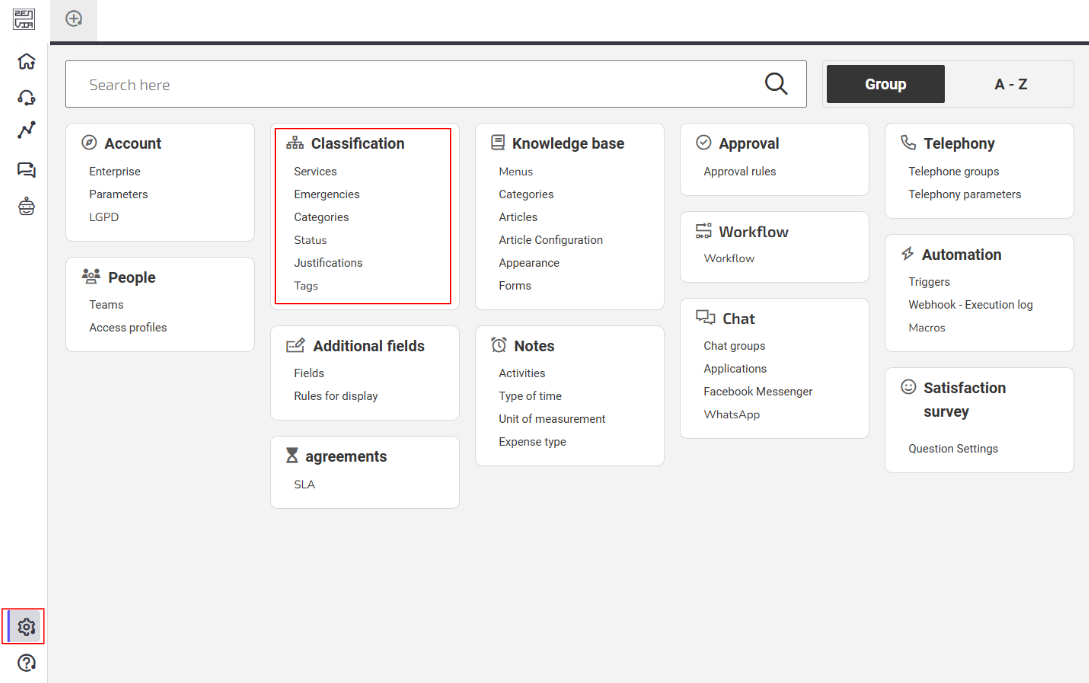
Access Support Attendance > Settings to configure the following classifications:
In Services, define the names of the services offered by your company to organize ticket classification, structuring teams by product or department, and creating dedicated visualization panels. A well-defined service catalog is essential for applying SLAs (Service Level Agreements), as deadlines may vary depending on the service.
How to configure Services
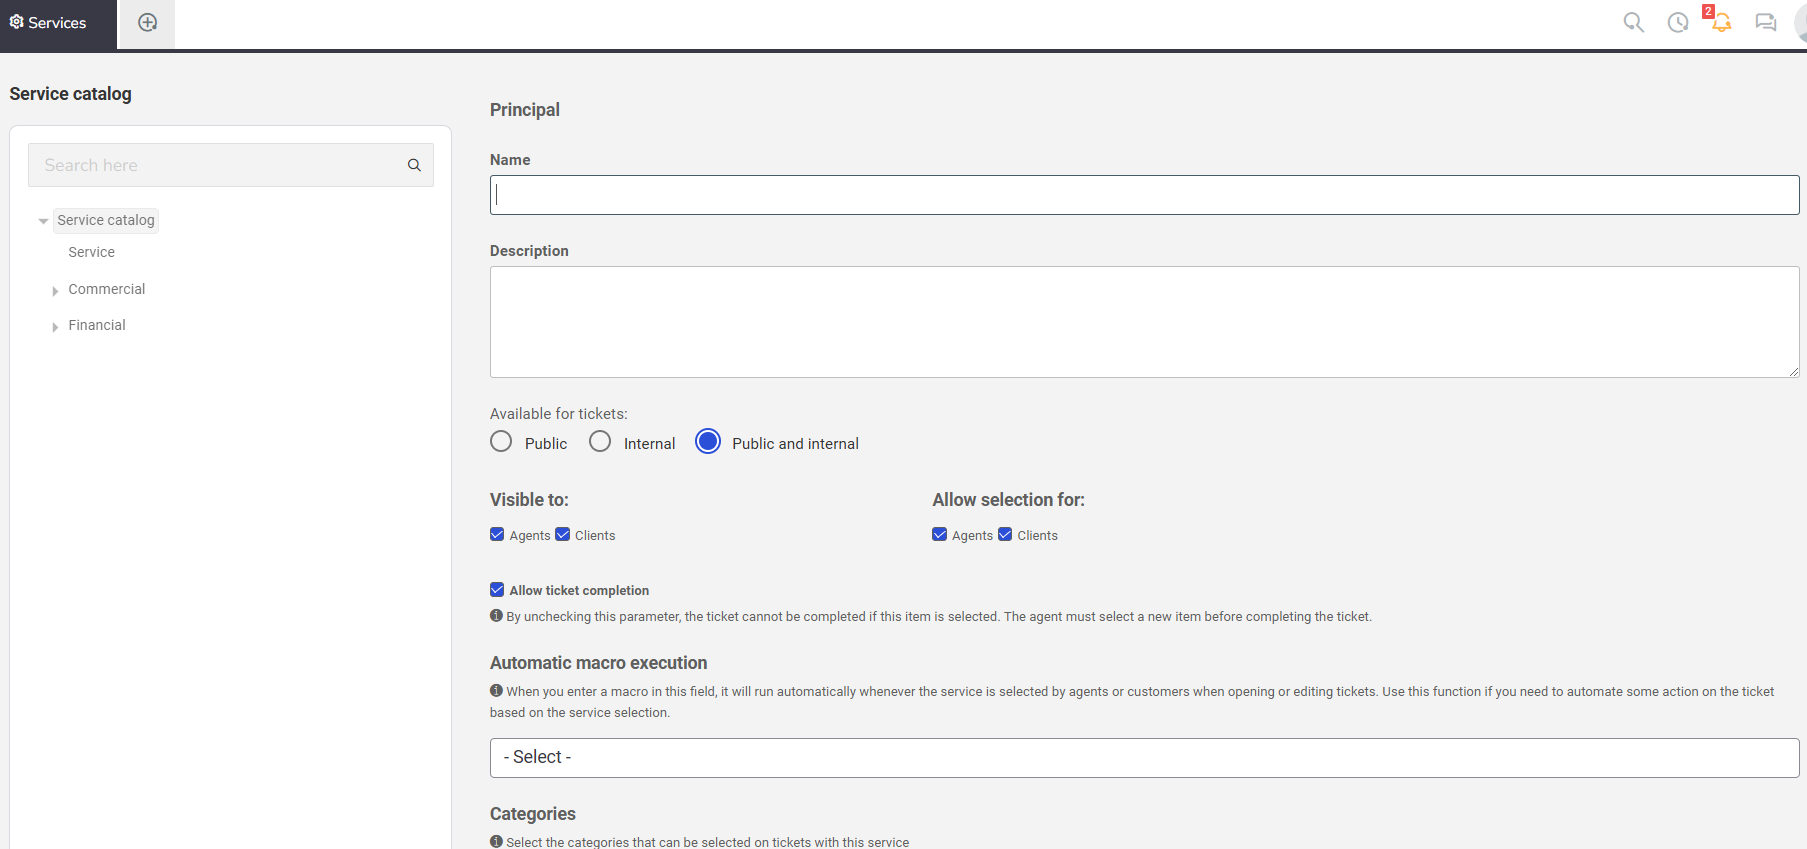
To access this feature, go to Support Attendance > Settings > Services. On the main screen, you will see the service catalog and the details recorded in the system.
Create a Service
1. Click on New;
2. Enter a name and a description for the new service. Example:
Name: Premium Services.
Description: Consulting on Zenvia Customer Cloud for premium customers.
3. In Available for tickets, choose from:
- Public
- Internal
- Public and Internal
4. Set the visibility: Agents, Clients, or both;
5. Choose who can select the service: Agent, Client, or both;⚠️Attention: Unchecking Allow ticket closureprevents automatic closure, requiring the agent to change the classification to close the ticket.
6. In Automatically run macro, select a macro to run automatically when opening or editing a ticket;
7. In Categories, choose Allow all categories or select specific categories, such as:
- Question;
- Problem;
- Service request;
- Suggestion.
8. Set the Urgency: High, Low, Medium, or Urgent;
9. In Agenda, select mandatory people and/or teams for all events, and enable Fixed Duration if applicable.
10. Save the information.
Done! The new service has been created successfully.
Urgencies determine the priority of tickets, helping agents identify the severity of each case. They are associated with Categories and can be adjusted as needed.
How to configure Urgencies
To access this feature, go to Support Attendance > Settings > Urgencies. On the main screen, you will see the default options: High, Low, Medium, and Urgent.
Create a new urgency
1. Click on + Add;
2. Choose a name that represents the urgency level of the ticket (e.g., Critical or Light);
3. Set a color;
💡Tip: Use warm colors for higher priority levels, such as red for "Critical".
4. Save the information.
Done! The new urgency has been successfully created.
After registering the urgencies, agents can select them when opening or editing tickets. Additionally, urgencies can be used in trigger settings, SLA agreements, and ticket views.
Categories identify and organize the type of ticket request, and can be either customized or default. For example, an improvement suggestion without urgency, such as adding an advanced search feature, can be categorized as "Improvement Suggestion" with low priority.
How to configure Categories
To access this feature, go to Support > Settings > Categories. On the main screen, you will see the default options: Doubts, Problem, Service Request, and Suggestion.
Create a new Category
1. Click on + Add;
2. Choose a name that represents the category of the ticket;
3. In Ticket Type, enable the category for Public, Internal, or both;
4. In Urgencies, choose Allow all urgencies or select which will be allowed in this category;
5. Save the information.
Done! The new category has been successfully created.
Status indicate the current situation of tickets, making it easier to track service progress. You can use the default options or create custom statuses to better organize the workflow.
How to configure Status
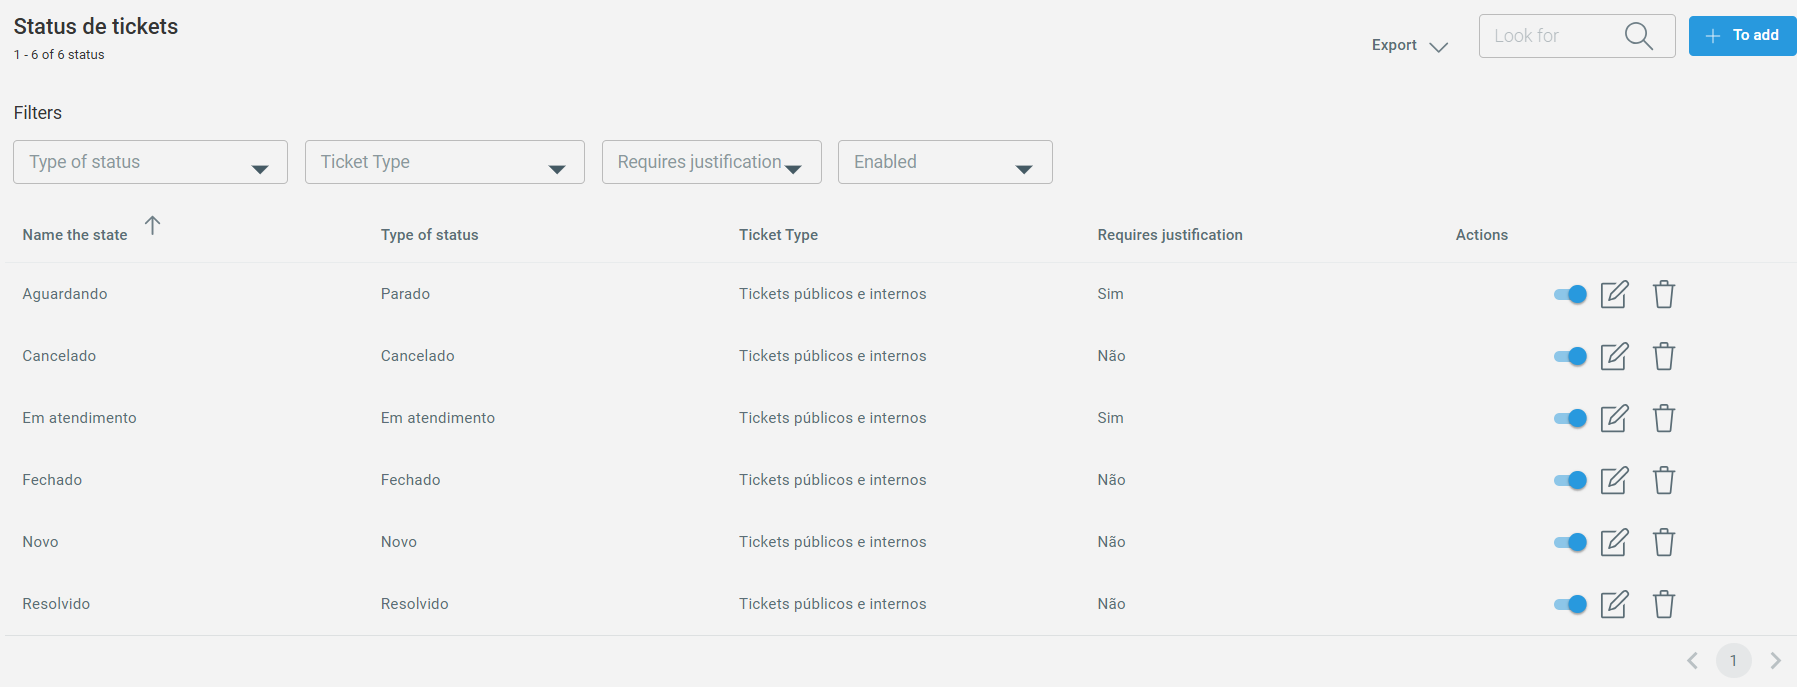
To access this feature, go to Support > Settings > Status. On the main screen, you will see the default options: Waiting, Canceled, In Progress, Closed, New, and Resolved.
Create a new Status
1. Click on + Add;
2. Choose a simple name, such as Waiting for payment;
3. In Status Type, define when in the ticket journey the status will be applied;
⚠️Attention: After creating and saving a status, it will not be possible to modify this field. For changes, disable the current status, create a new one, and update the tickets that require this change.
4. In Ticket Type, choose whether the status will be applied to Public, Internal, or Both tickets;
5. In Justification, define whether a justification will be required when selecting the status. To configure, go to: Classification > Justifications.
Done! New status created successfully.
💡Tip: Before editing or deleting a status, check if there are any associated tickets and make the necessary changes beforehand.
Justifications are explanations associated with the ticket's status, detailing the reason for its current state. They are commonly used with the Stopped status but can be applied to any status, such as Cancelled. They can also be configured to be mandatory. When enabled, it will be necessary to select a justification when choosing the status. Otherwise, the justification will be optional.
How to configure Justifications
To access this feature, go to Support > Settings > Justifications. On the main screen, you will see the default suggested options, which can be customized according to your business needs.
Create new Justification
1. Click on + Add;
2. Choose a name that complements the statuses to which the justification will be associated;
3. In Ticket Type, select whether the justification will be for Public, Internal, or Both;
4. In Status, select the statuses where this justification will be available:
- Waiting
- Cancelled
- In progress
- Closed
- New
- Resolved
5. Save the information.
Done! New justification created successfully.
How to use the justifications
Justifications are used in several functionalities of Zenvia Customer Cloud, always along with the status list. See where they can be applied:
- Triggers: in trigger conditions;
- SLA Agreements: in ticket pause rule definitions;
- Ticket creation and editing;
- Ticket view.
Tags are labels used to identify specific situations in support services, such as an email sent or issues with a version.
How to configure Tags
To access this functionality, go to Support > Settings > Tags. On the main screen, you will see all your existing records.
Create a new Tag
1. Click on New;
2. Enter a name for your tag, such as Cost-benefit;
3. Save the information.
Done! The new tag has been created successfully.
Usage example
Create a trigger to send an email when the customer does not respond to the ticket within three days.
Trigger Settings:
Conditions:
- Status: Equal to Stopped
- Justification: Equal to Customer return
- Action: Not recorded after (elapsed hours) > 72 hours
- Ticket: Tag different from Notification sent
Actions:
- Action: Send email
- Sender: Account that received the email
- Recipient: Ticket customers
When the trigger is activated, the email will be sent, and the tag Notification sent will be added to the ticket. This ensures that the customer will not receive the same email more than once. Other triggers can be created to change the tag, such as when the customer responds, without affecting the workflow.


