The support inbox in Zenvia Customer Cloud is the environment where conversations between agents and customers take place via tickets.
In the inbox, you can view conversations organized by status: Open, Queued and Pending. Use filters to sort conversations by oldest or most recent, or to view them by all groups or specific ones.
Managing conversations
The left panel displays all interactions between customers and agents, as well as ongoing conversations. The displayed information includes:
- Customer name
- Conversation date
- Origin channel (WhatsApp, Facebook, or Webchat)
- Conversation preview (the first line of the conversation is shown below the customer's name)
Note: When a conversation times out due to inactivity, it is automatically closed by the system and remains linked to the support ticket. If you need to reach back out to the customer after it closes, use the reconnection flow available within the ticket to start a new conversation.
Available actions
When selecting a contact, you can access the following options from a dropdown menu:
Close chat
Closes the conversation with the customer.
See details
Opens the chat with the conversation history, including start date and time, interaction timestamps, and read receipts.
Actions within the conversation
While chatting with the customer, you can perform several key actions to manage the conversation:

Click the customer’s name to view information like full name, email, phone number, and other registered details.
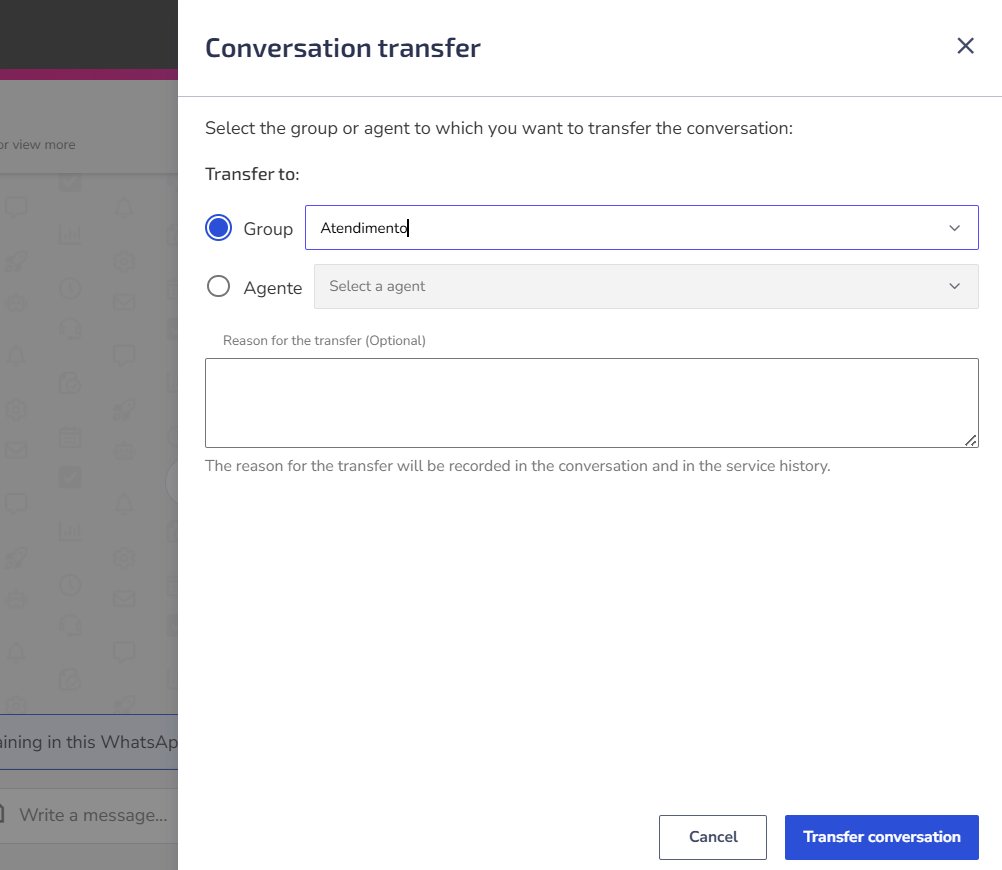
Transfer conversation
You can transfer the chat to another agent or department as needed.
Create a new contact during the service
During a support service, you can create a new contact directly from the Service Inbox.
To do this, click the Create contact button, located next to the service status selector.
When clicked, a side drawer will open with the contact creation form.
When creating a contact, the displayed form may include the following fields:
- Contact details: First name, Last name, Mobile phone, Email
- Tags: You can select existing tags or create a new one.
- Extra fields: Additional fields may be displayed if they were previously configured.
Close chat
To end a chat, it must be linked to a ticket. If there isn’t one yet, you will need to create or link it to an existing ticket.

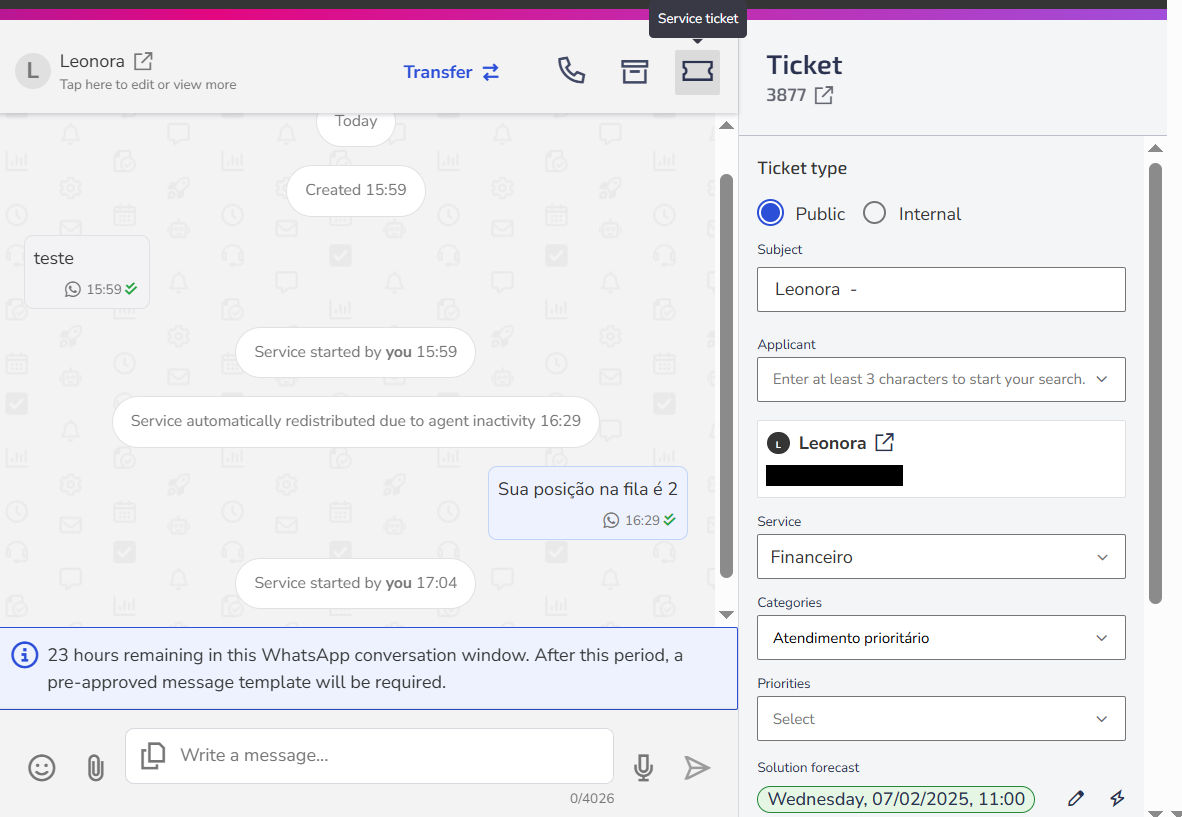
If the chat is already linked to a ticket, clicking the ticket icon will show details like ticket number, status (Open, In progress, Resolved, etc.), subject, ticket type (Public or Internal), requester, related service, category, priority, expected resolution date, and responsible agent.
Send messages
The inbox provides several resources for sending messages, including emojis, file attachments, voice recordings, and more.
Use the AI Assistant during the service
Use the AI Assistant to help create and refine messages sent to the customer. It is available in the chat text box toolbar, next to the attachment button, and can be used while the text field is active for editing.
With the AI Assistant, you can:
Generate content: Allows you to create a message based on a description of what you want to communicate. Example: Inform the customer that the ticket has been received, is under analysis by the support team, and that we will get back to them within 24 hours.
Expand or summarize text: Allows you to increase the level of detail of the message or reduce the text to a more concise version, respecting the character limits of the feature.
Adjust the tone of the message: Adjusts the tone of the written text according to the desired profile: more professional, more informal, or more friendly.
Simplify the language: Rewrites the message using clearer and more direct language, making it easier for the customer to understand.
Correct spelling: Identifies and corrects spelling and grammatical errors in the text, while preserving the original meaning of the message.

Listening to audio messages
You can listen to audio messages sent by the customer directly in the Support inbox conversation. During audio playback, you can adjust the playback speed according to your preference. 
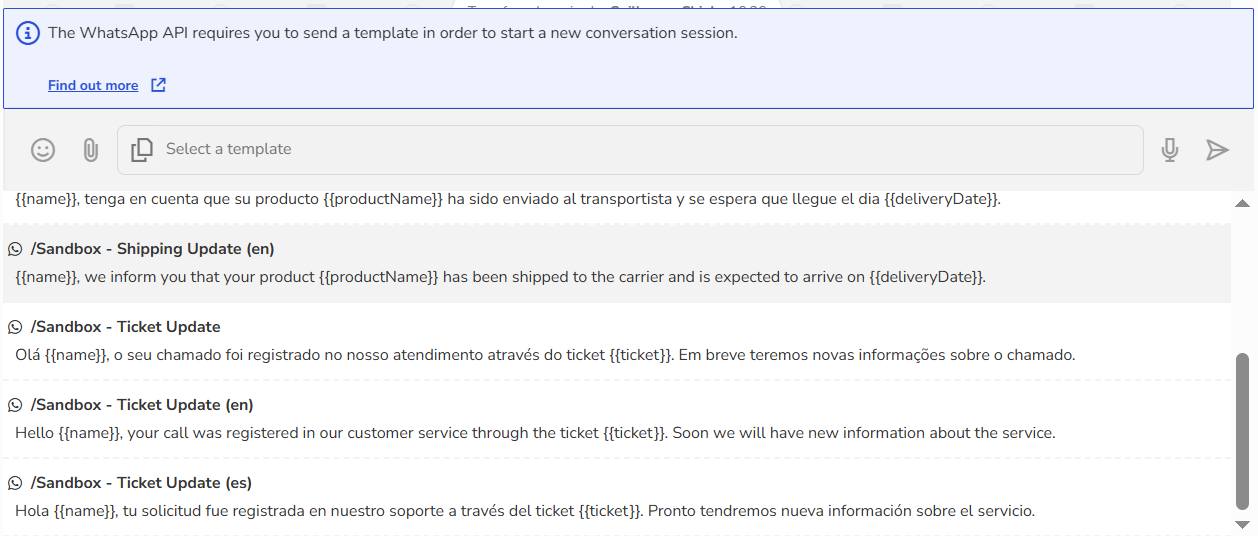
First contact via WhatsApp
To start a conversation on WhatsApp, you must send a pre-approved template message by Meta. Use one from your template gallery.
After selecting the template to start the conversation, set the duration the chat will remain open while awaiting a response. Once this period ends, the conversation will close automatically and remain linked to the support ticket.
24-hour window
After sending the first message, a 24-hour window opens, allowing unlimited messages with the customer. After this period, a new template message must be sent to resume the conversation.
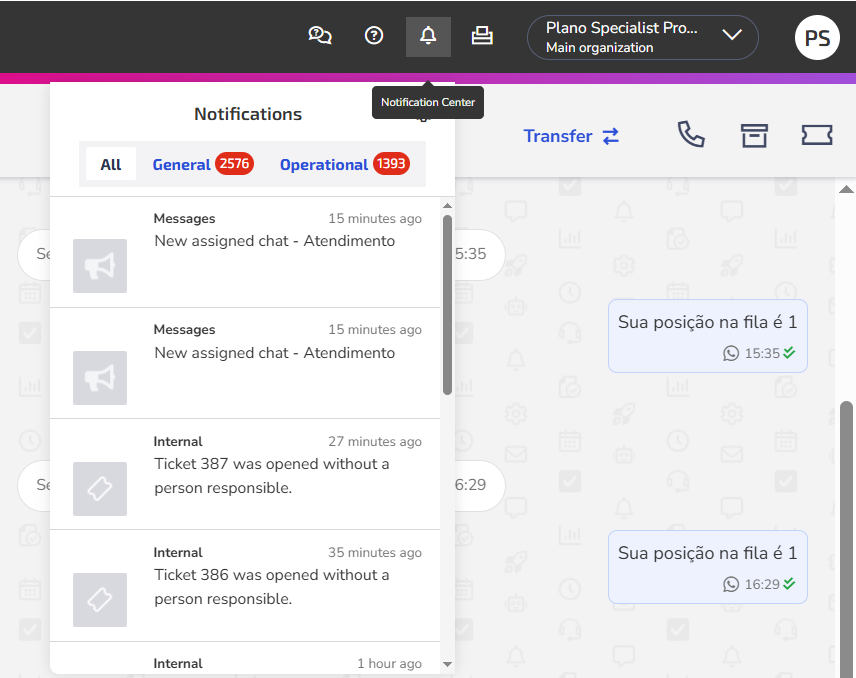
Enable or disable chat notifications
Notifications about your support chats include sound and browser pop-up alerts in the following situations:
- New chats automatically assigned to you;
- Chats manually assigned by other users;
- New messages in active conversations;
- New chats waiting for service.
To manage your notifications:
1. Click the notification bell icon and then go to settings in the top menu of Zenvia Customer Cloud;
2. Enable or disable the Message option in Notification Preferences.
Need help with Zenvia Customer Cloud?
If you follow the instructions in this article and still have difficulties or questions related to Zenvia Customer Cloud, please contact our Support team directly. Check the step-by-step guide in the article: How to contact Zenvia Technical Support.