If you use another Zenvia platform to triage your customer service interactions and have already configured interoperability with Customer Cloud, this guide will show you how to correctly send customer information to the human agent.
In this article, we will focus on configuring the handoff variables: name, phone number, and email.
Understanding the standard variables
When configuring the handoff, you can use predefined variables to send customer data. See the table of the most important variables below:
Variable format
Informação | Variável usada no fluxo | Observação complementar |
|---|---|---|
Name | <? $name ?> | To collect the name the user uses on WhatsApp, use <? $visitor.name ?> |
| Phone | <? number ?> | Phone number captured during service. |
| Default (already configured) | No need to add manually. |
Handoff configuration
For this handover to work, you will need to create three parts (blocks) within your conversation flow:
Block 1: The transfer block: This is where you will tell the system that the conversation needs to go to a human agent.
Block 2: The service block: This is the space where the customer will talk to the human agent.
Block 3: The end of conversation block: After the agent helps, this block will end the service.
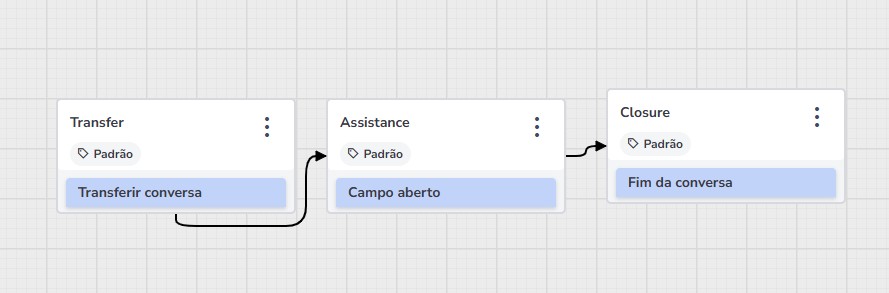
Let's see how to create each one of them.
Block 1: Creating the transfer block
1. Click the "Add content" button and search for "Conversation actions." Then, click on "Transfer conversation."
2. Choose the "Human service" option.
3. Now, you need to say what type of service it will be:
3.1 Sales Service: If the customer wants to buy something or learn more about business opportunities. In this case, you will need the "Group ID" or "User ID."
This information is like an identification code for the sales team or a specific salesperson. To get these codes, talk to the platform's support team. You can contact Instant Support, our virtual assistant, by clicking the icon located in the upper-right corner of the Zenvia Customer Cloud screen.
Follow the instructions she gives you until you are forwarded to one of our analysts. They will help you find the correct ID.
3.2 Support Service: If the customer has questions or problems to solve. In this case, you will choose which service group will receive the conversation. For example, it could be the "Technical support" or "Customer service" group.
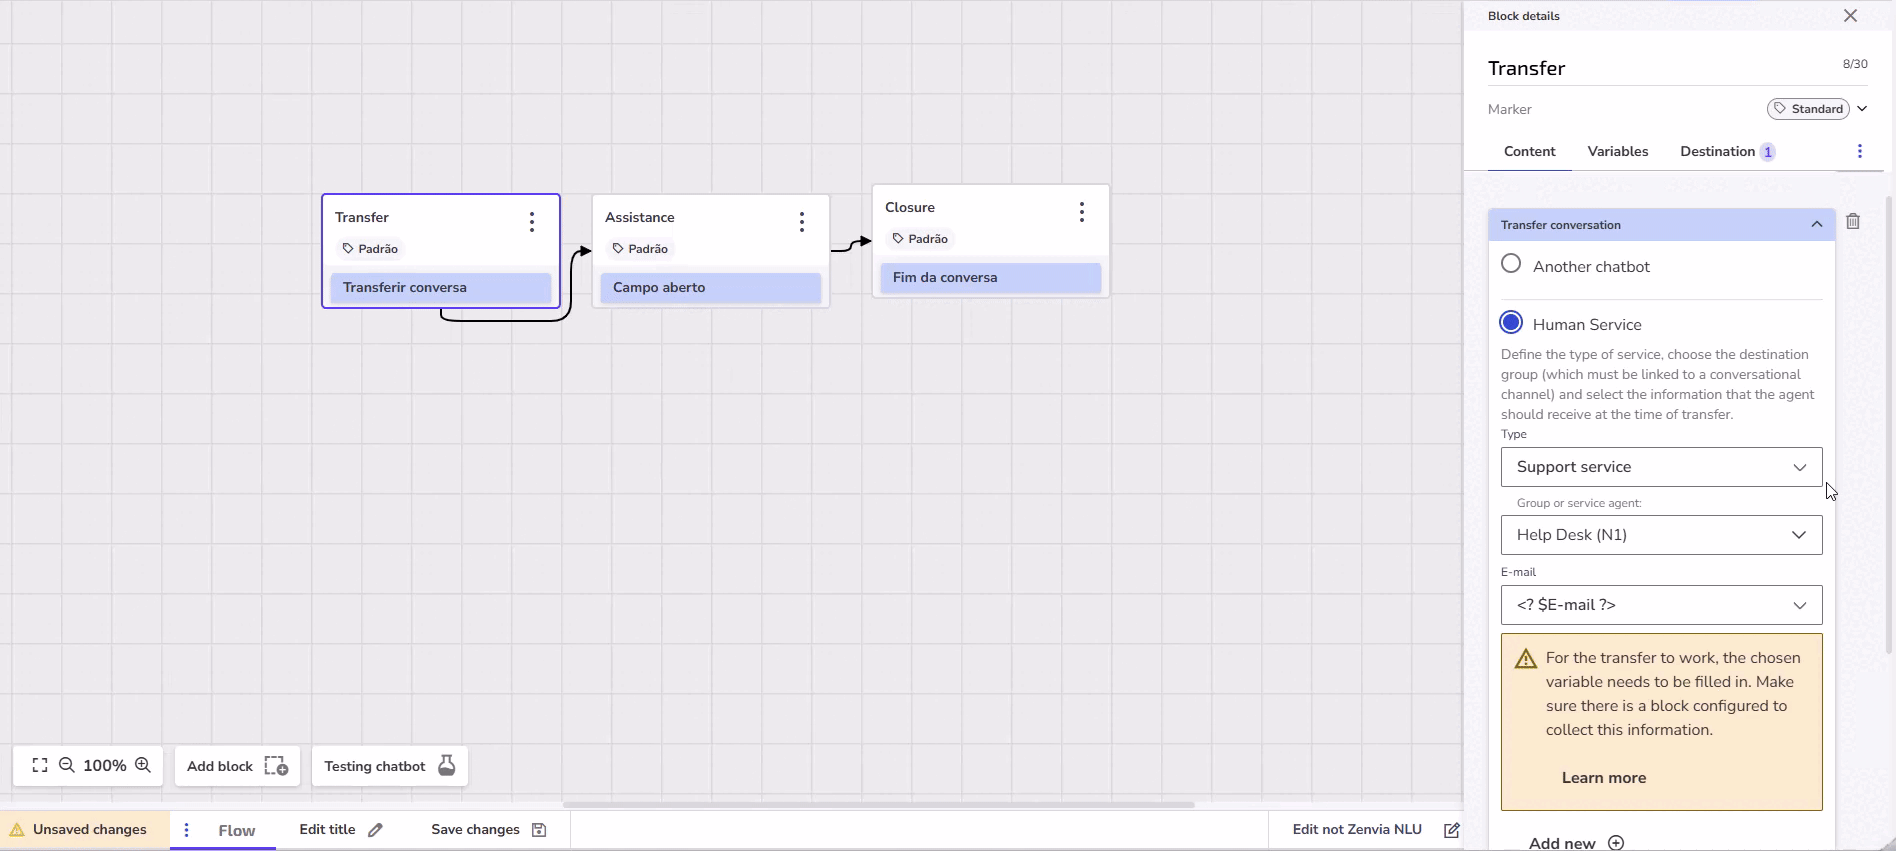
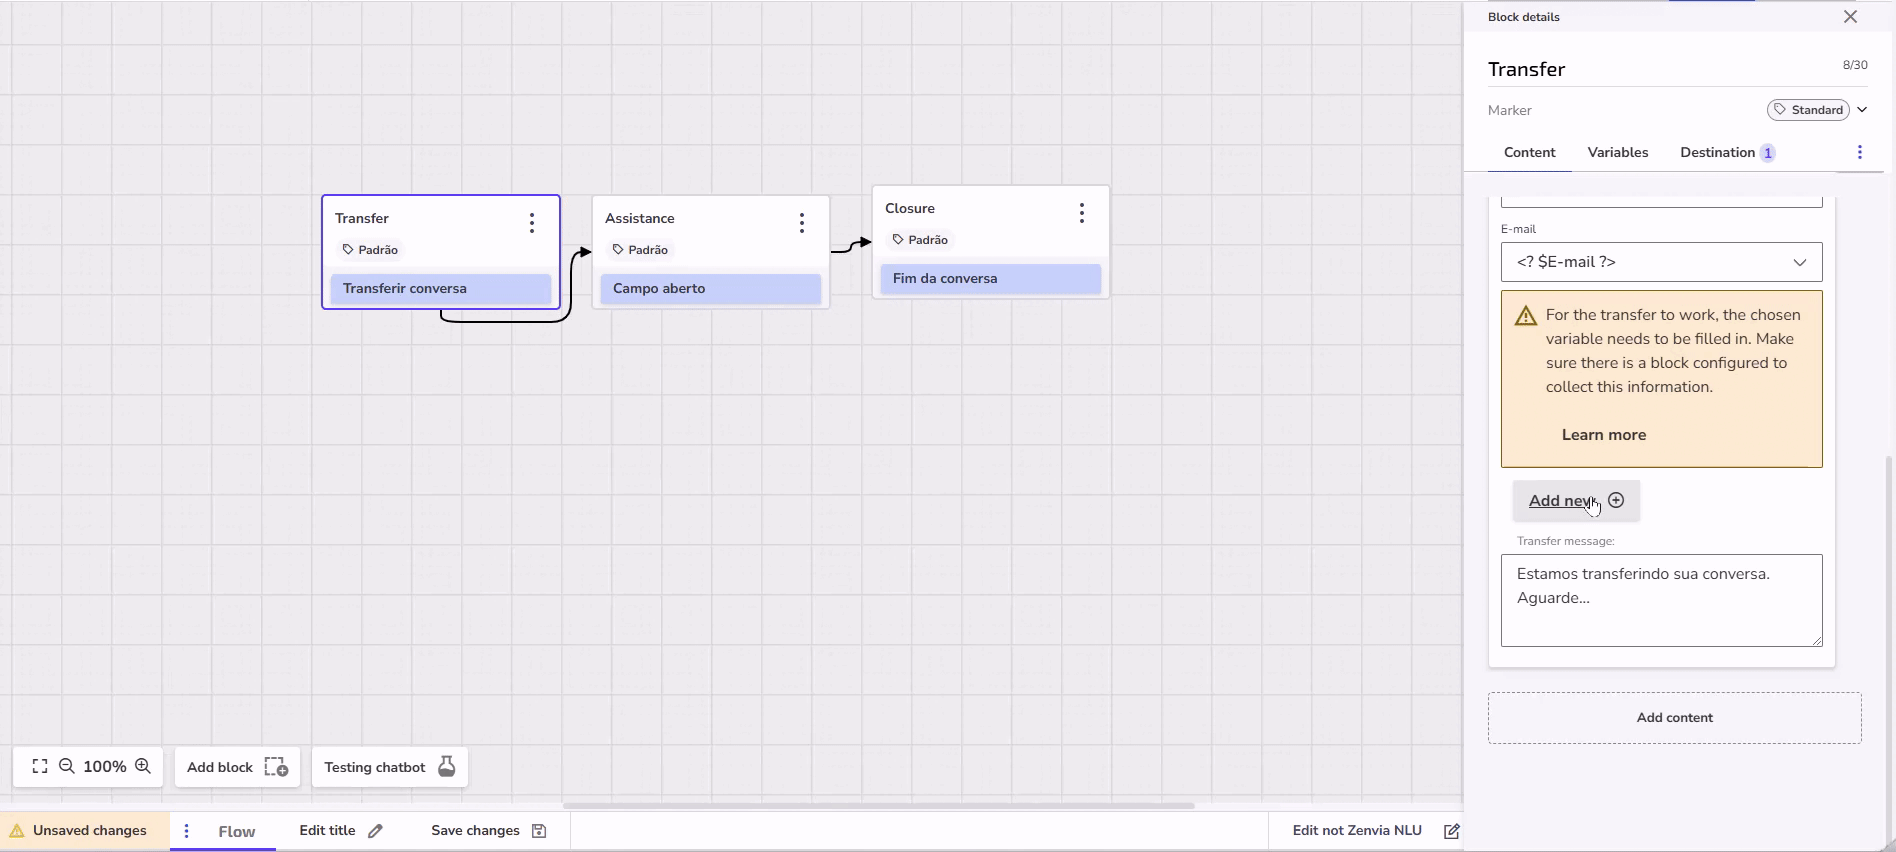
4. Email: The customer's email address already appears automatically checked and is mandatory. This way, the agent will have the customer's contact information.
5. If you want to get more information from the customer before passing them to the agent, click "Add new." You can add options like: "Customer's phone:" (which will appear as <$phone ?>) or "Customer's name:" (which will appear as <$name ?>).
6. Transfer message: Write a short message that the customer will see while the conversation is being transferred. A suggestion is: "Please wait a moment, we are already transferring you to an agent."
Block 2: Creating the service block
Create a new block and name it "Service."
Click on "Add content," then on "Data input," and choose "Open field." This field is where the customer will talk to the human agent.
After creating this block, go back to the "Transfer service" block. In the "Destinations" section, choose the "Service" block. This means that after the transfer message, the conversation will go to this block.
Block 3: Creating the end of conversation block
Create the last block and call it "Closing."
Click on "Add content," then on "Conversation actions," and choose "End of conversation."
Write a thank you message, such as: "Thank you for contacting us!"
After creating this block, go back to the "Service" block. In the "Destination" section, choose the "Closing" block. This way, after the agent finishes the support, the conversation will go to this final message.
Done! Now you know how to make the chatbot hand over the service to a real person.
Complementary content
How about learning more about the chatbot module in Customer Cloud?
We have prepared various content in the Help Center that can help you further explore functionalities:
📚 Understanding the functionalities of the Chatbot List: View all your bots in one place, filter by type, search by name or status, and manage your publications more easily.
📚 Explore the chatbot builder: Learn how to create custom conversation flows, add content, configure destinations, and use variables to make your chatbot smarter.
📚 Learn how to create flow chatbots: See how to build chatbots from scratch or with assistants and ready-made templates, and learn about features such as satisfaction surveys, transfers, and integrations with WhatsApp Flows.